Quick Start (GUI)
Start evaluating prompts with elluminate using the web interface in just a few minutes
No coding required! For a code-based approach, see our SDK Quick Start.
Prerequisites
You'll need:
- An elluminate user account
Step 1: Log In and Access Your Project
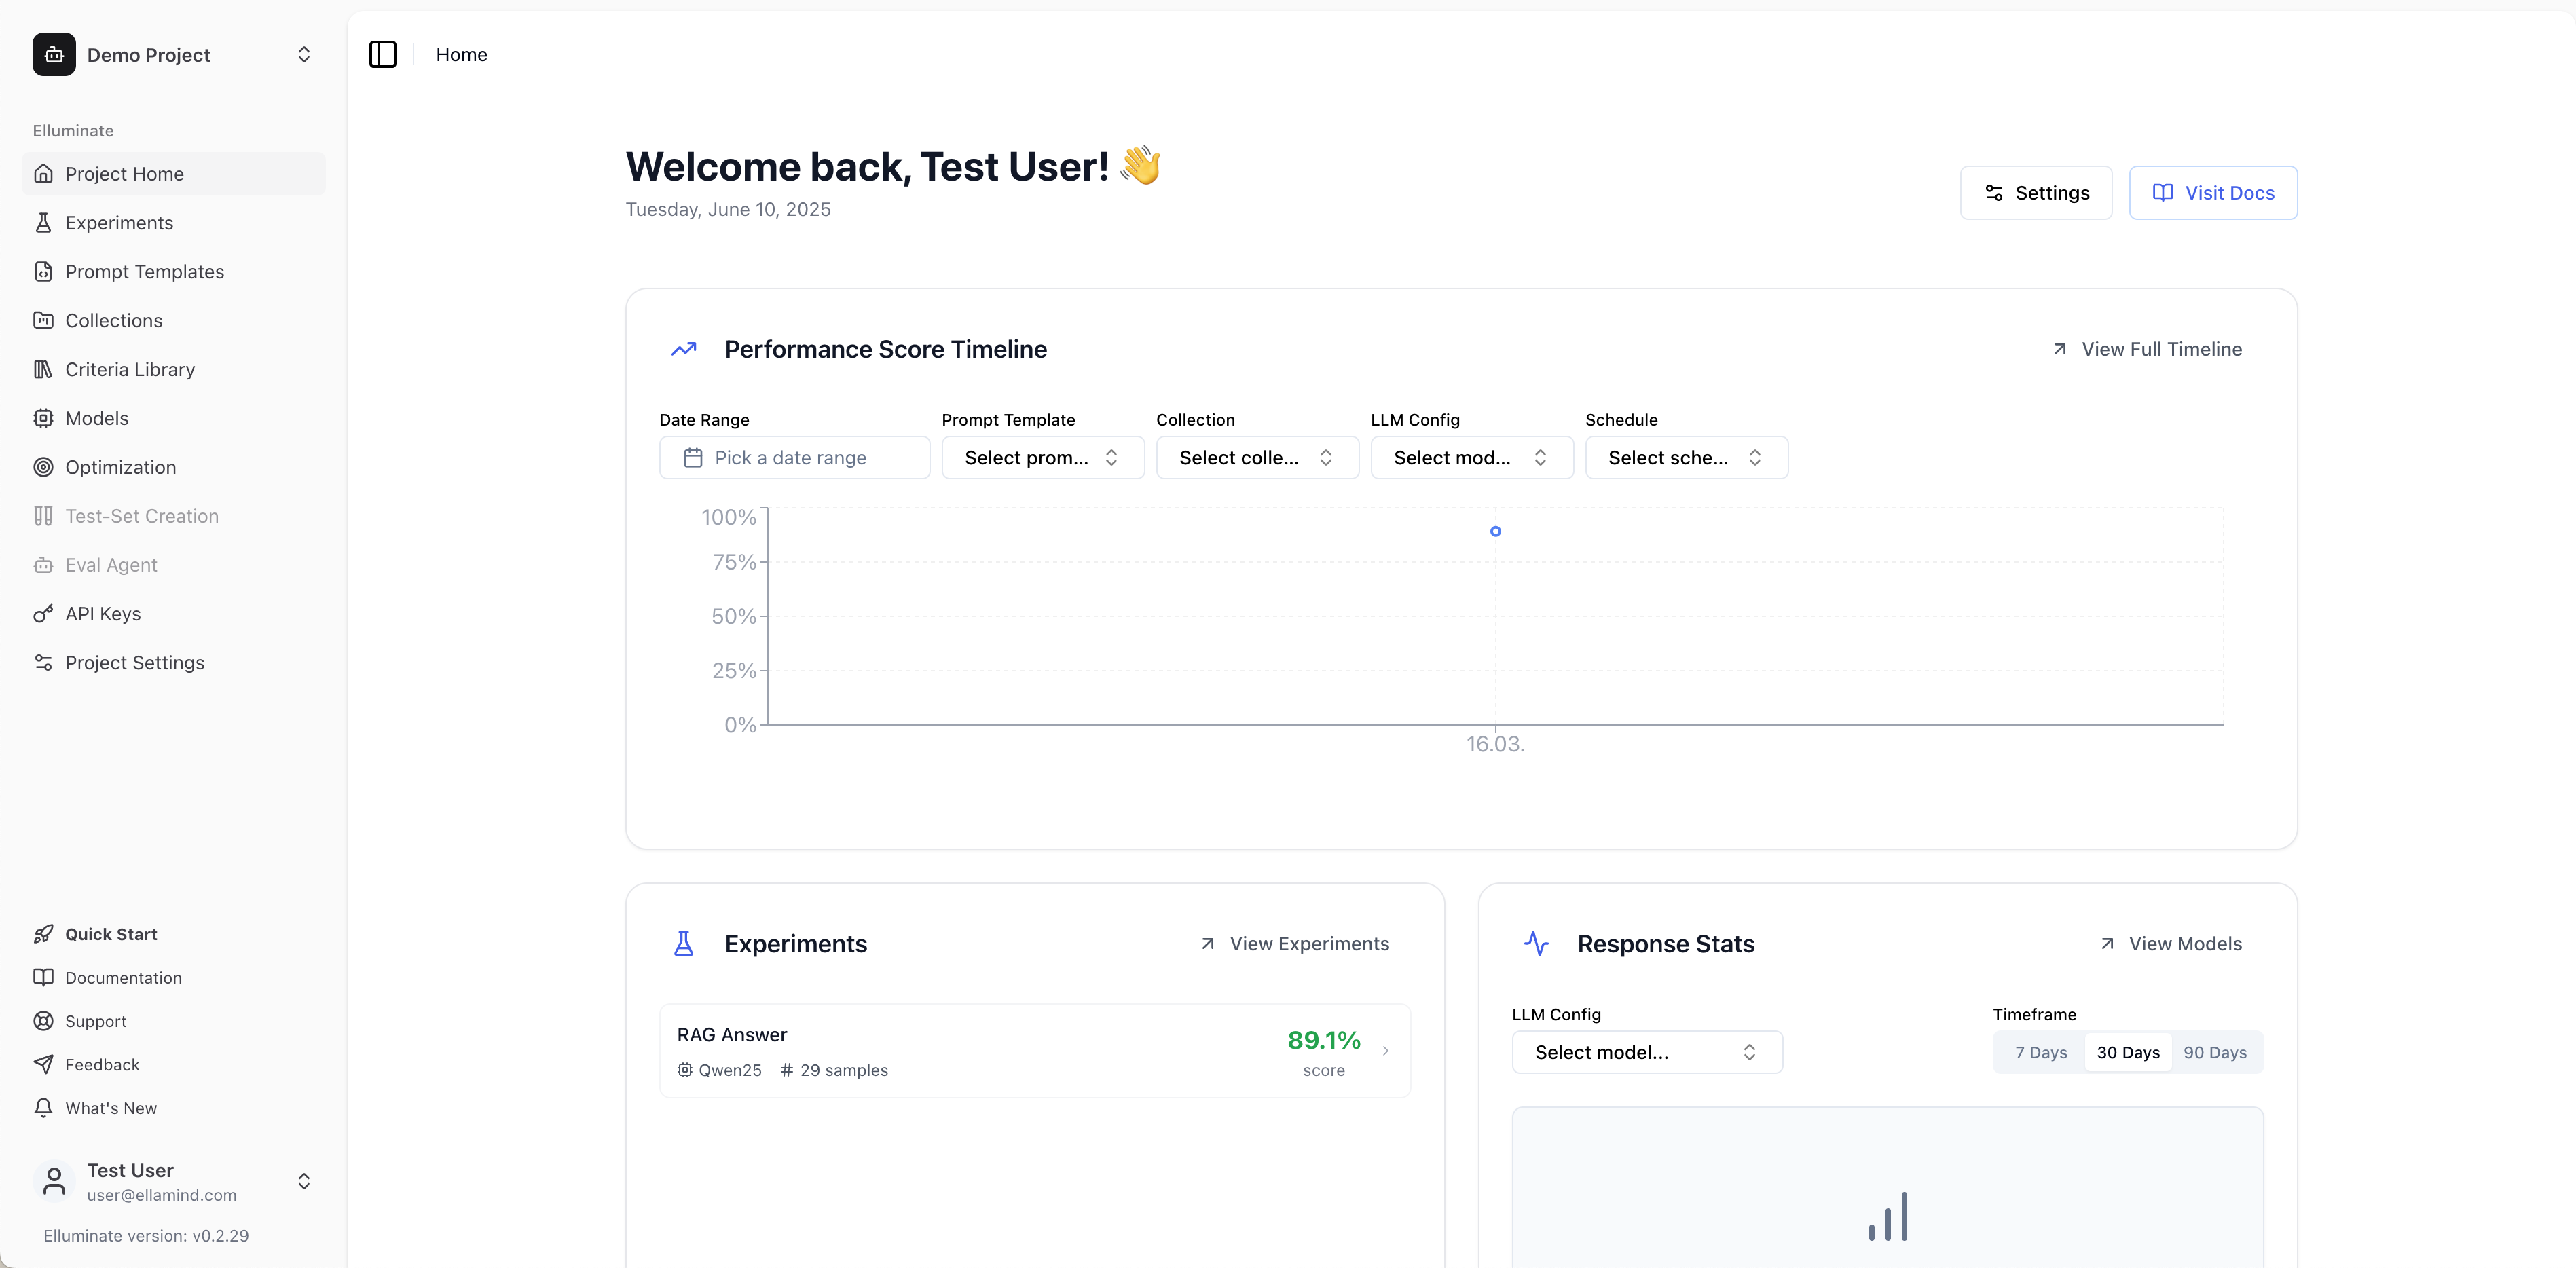
Navigate to app.elluminate.de or your custom deployment and log in with your credentials.
Step 2: Create a New Test Project
For this tutorial, we'll create a fresh project to experiment with. This keeps your test data separate from any existing work.
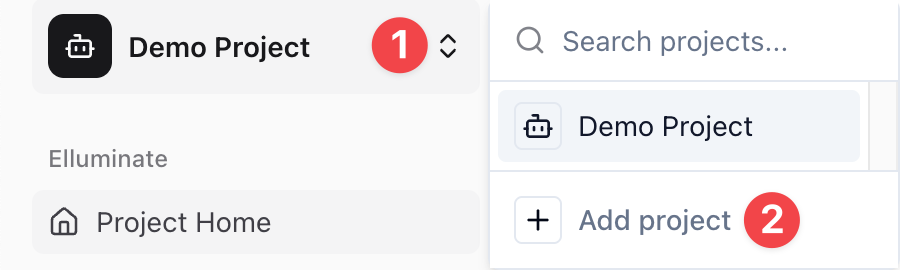
1. Click on the project name in the upper left corner (e.g., My First Project)
2. In the dropdown, click Add project
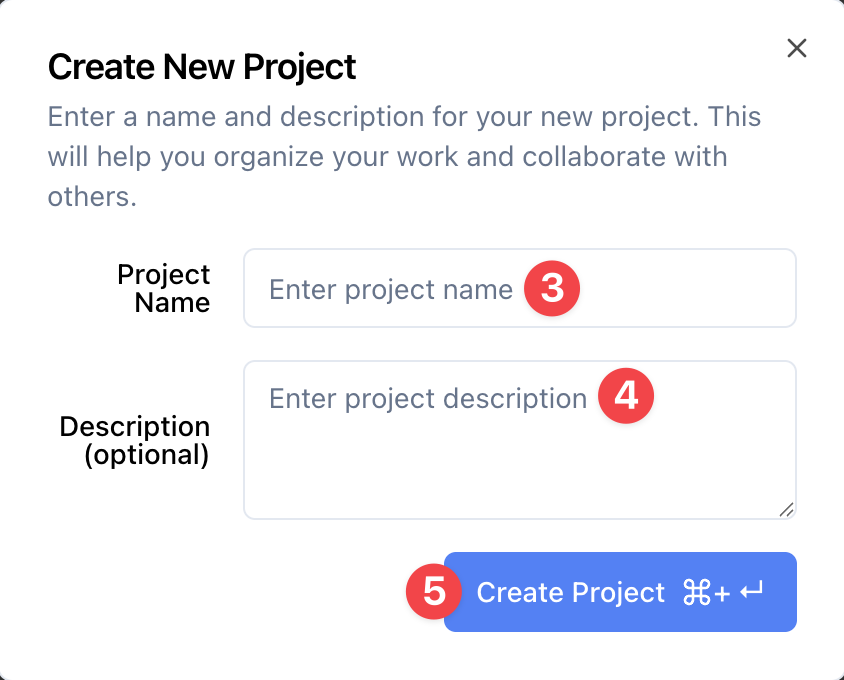
3. Fill in the Project Name: "Test Project" (or any name you prefer)
4. Optionally, fill in the Description: "A test project"
5. Click Create Project
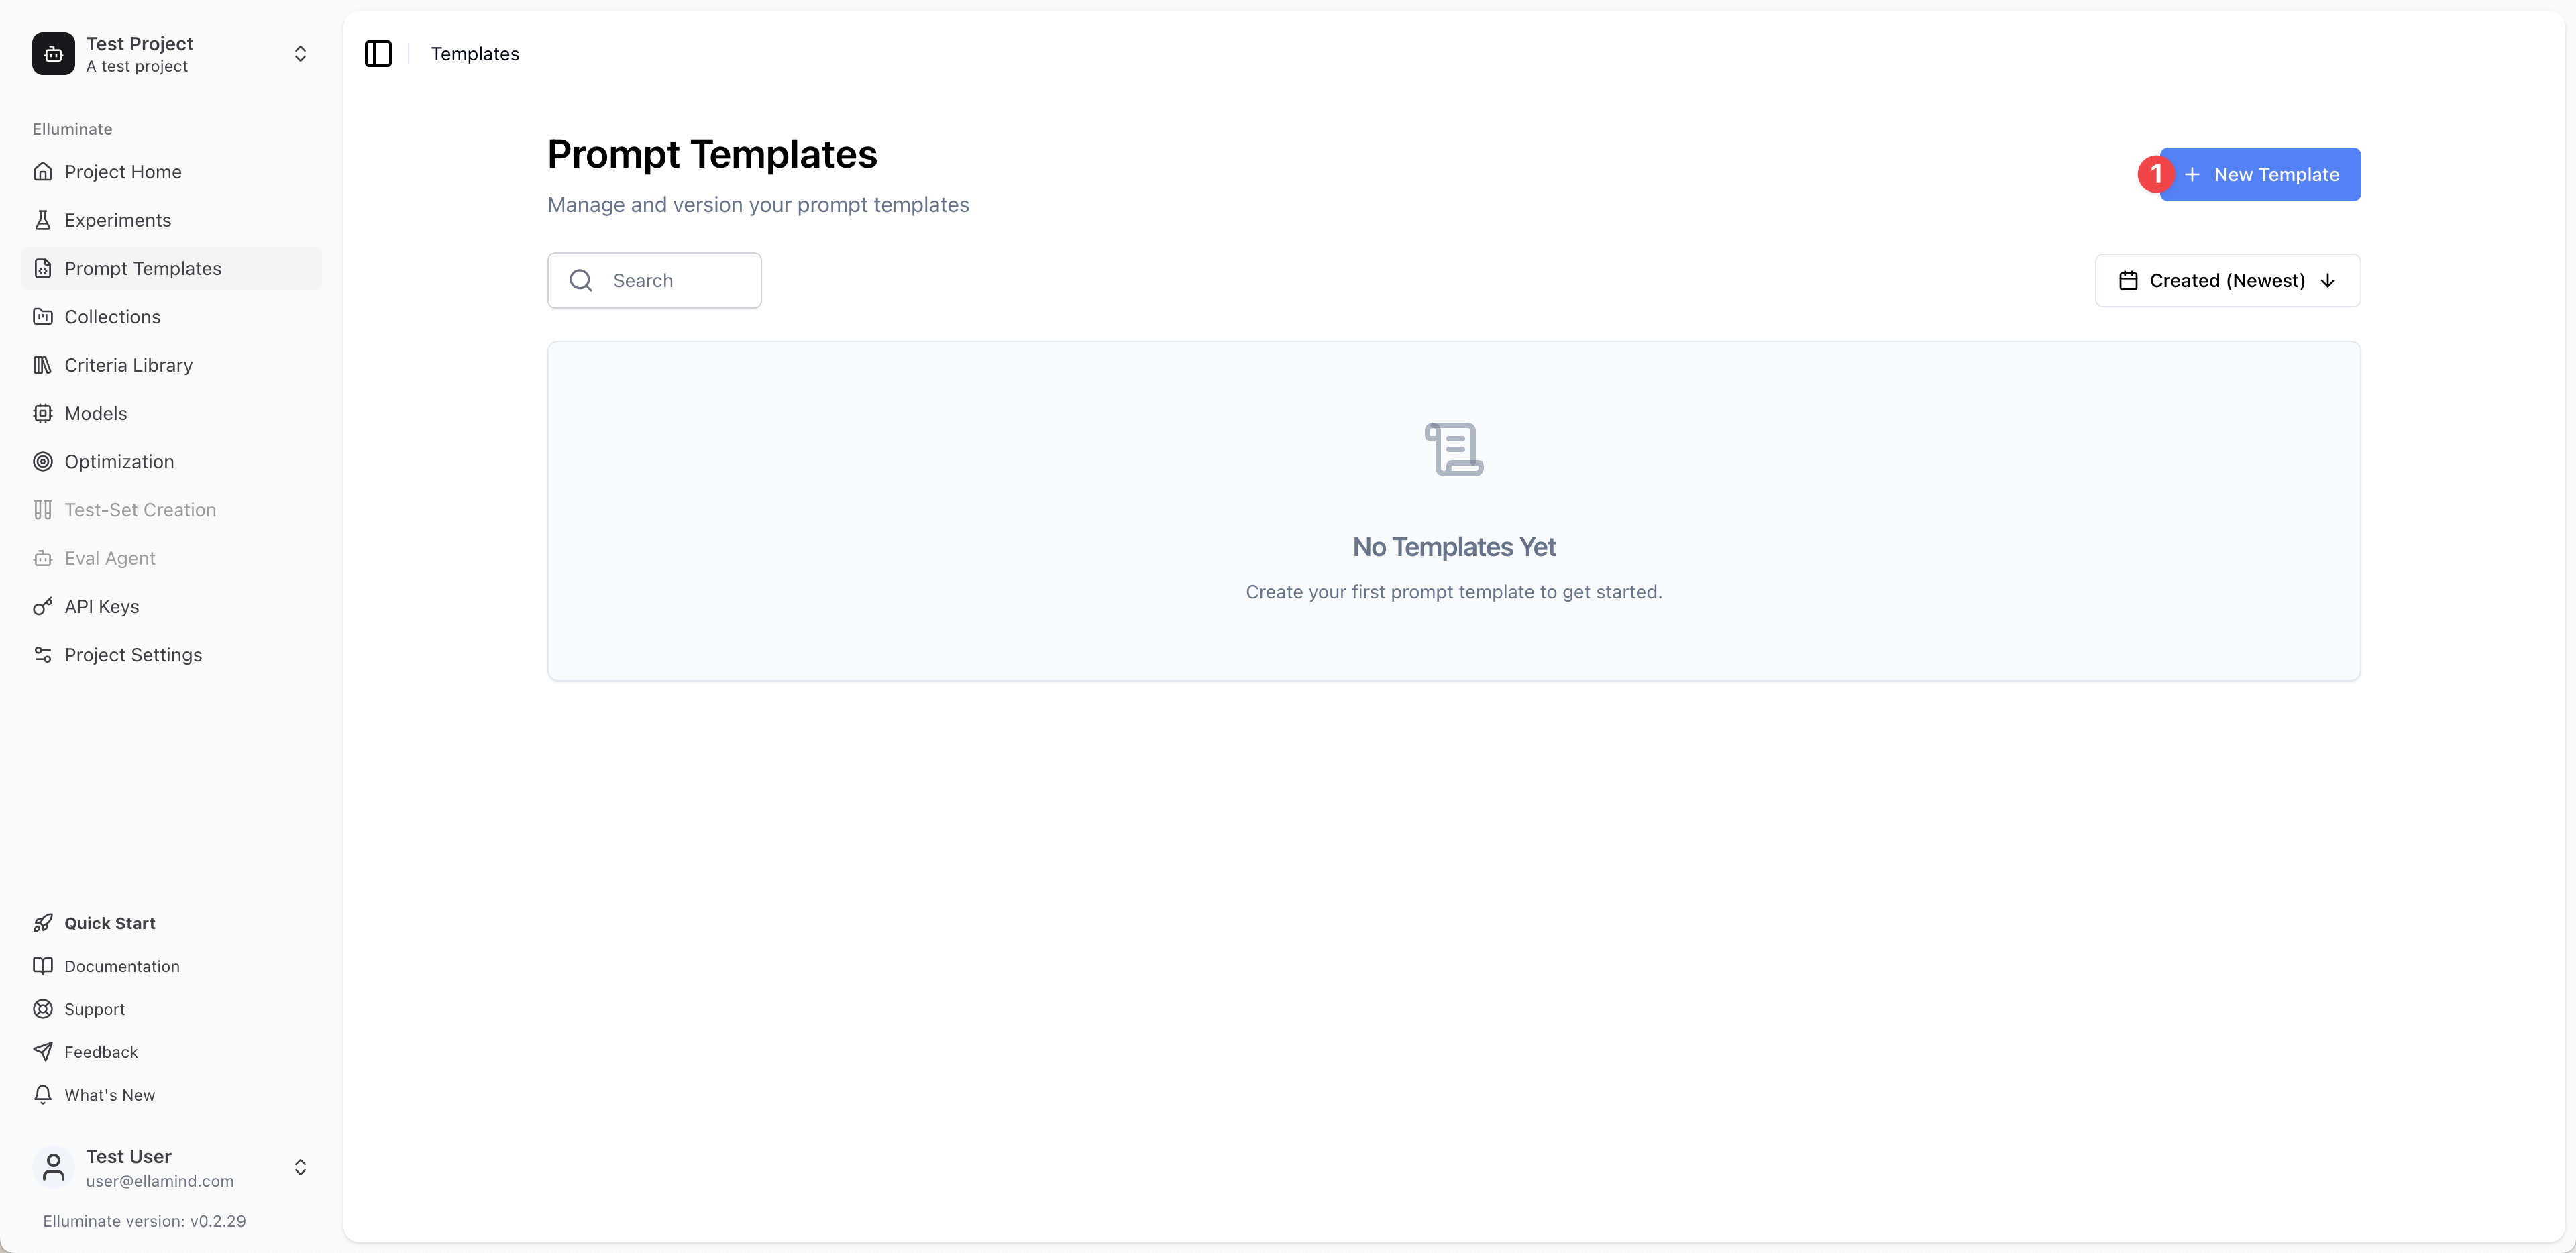
6. You'll now see your new project with the empty Prompt Templates page displayed
Step 3: Create a Prompt Template
Create your first prompt template. You should already be on the Prompt Templates page from the previous step, but if not, click on Prompt Templates in the sidebar.
1. Click the New Template button in the upper right corner
2. Enter the Template Name: "Support Bot"
3. Enter the User Message: "You are a customer service agent. Provide helpful and friendly advice to the user query: {{user_query}}"
4. Click Create Template to create your template
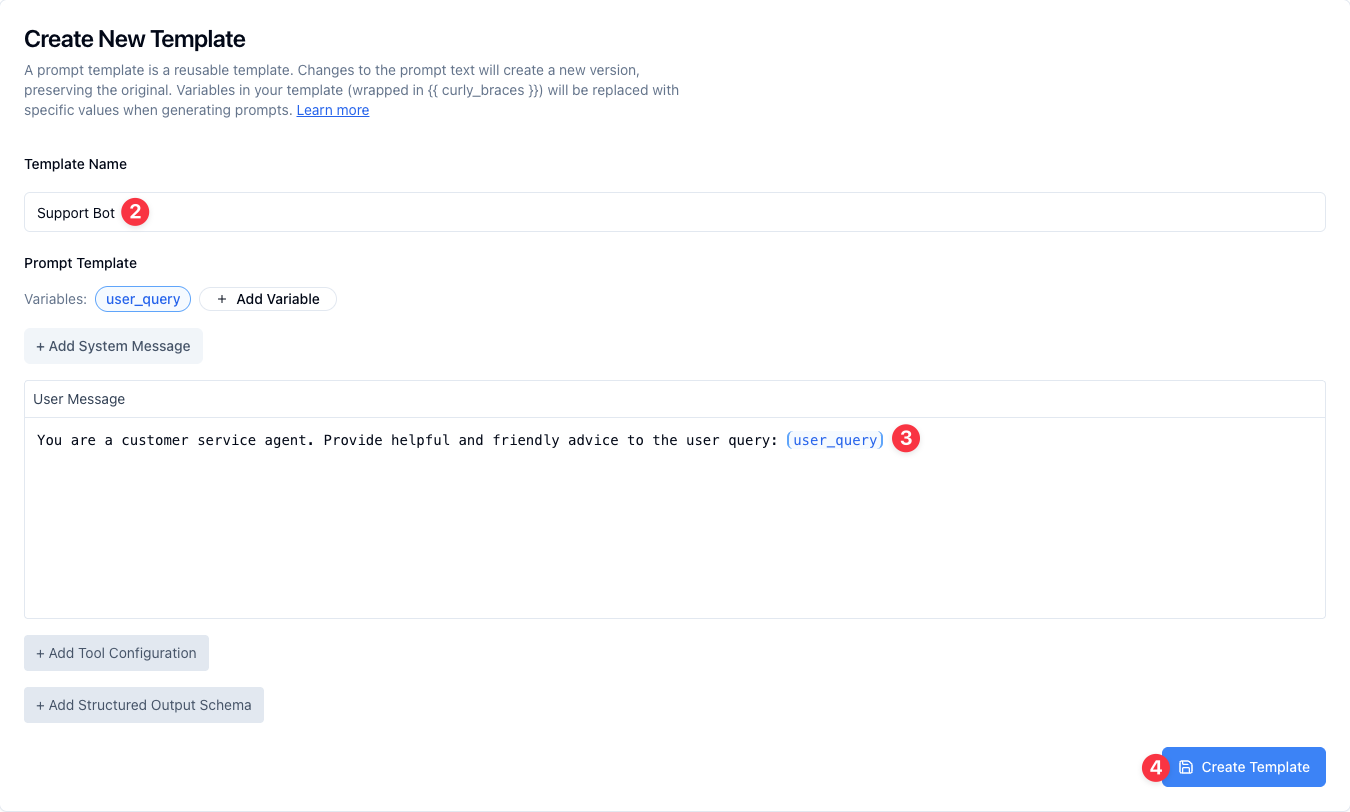
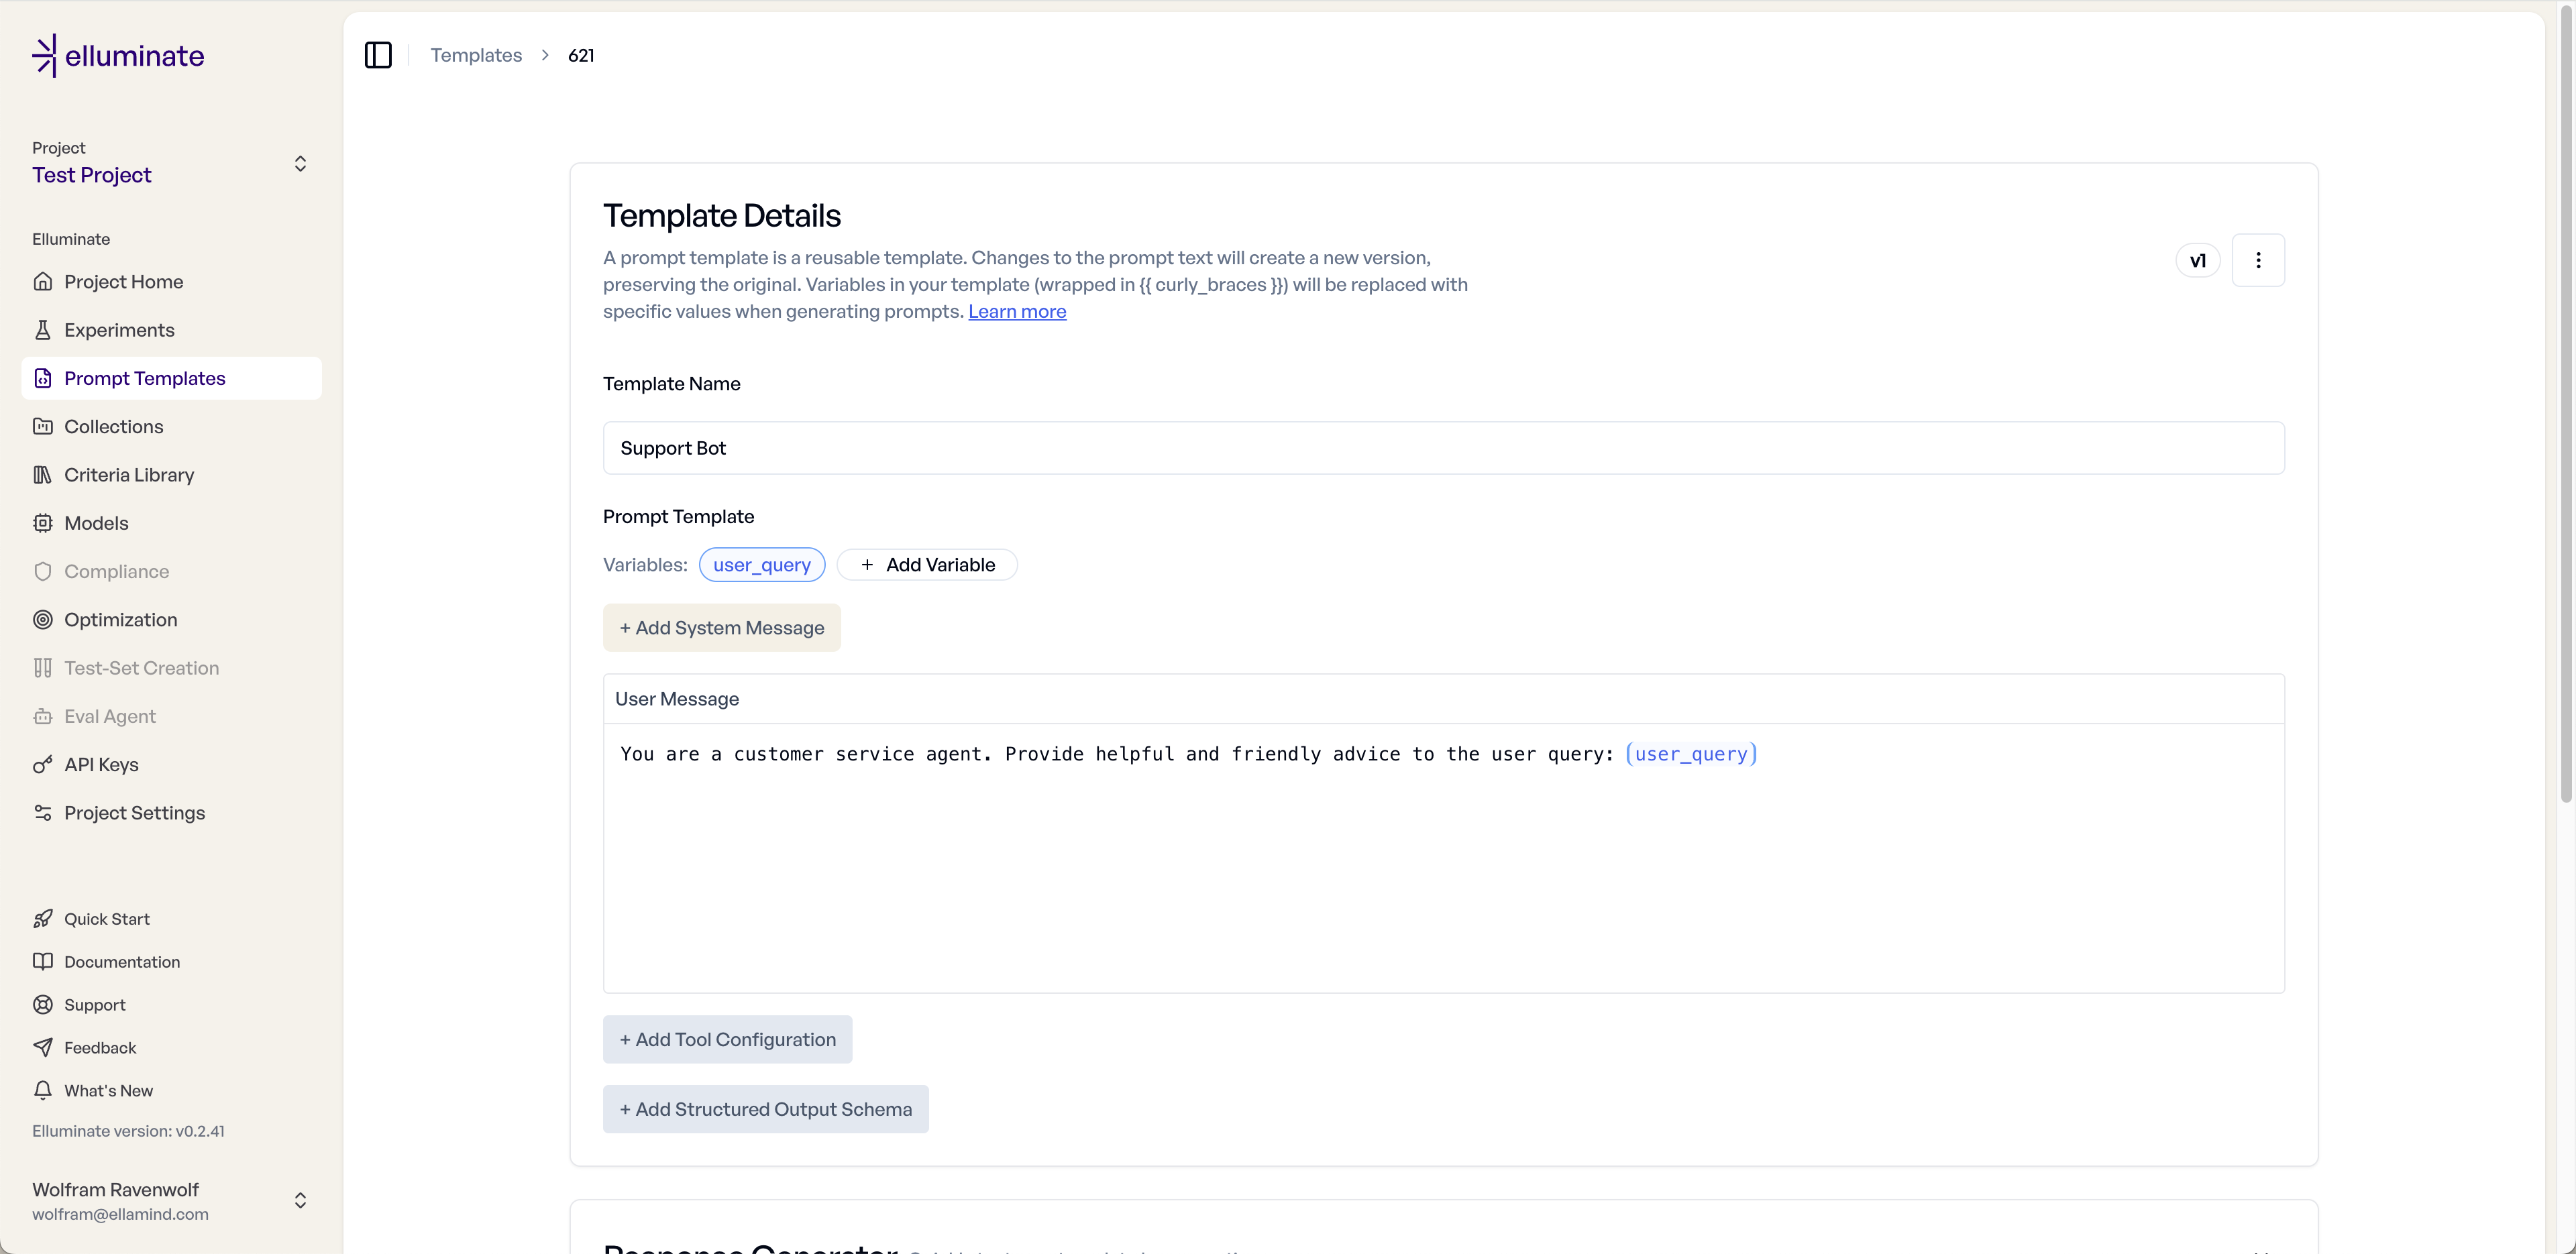
5. You'll now see with Templates Details page displayed
Step 4: Test Your Template
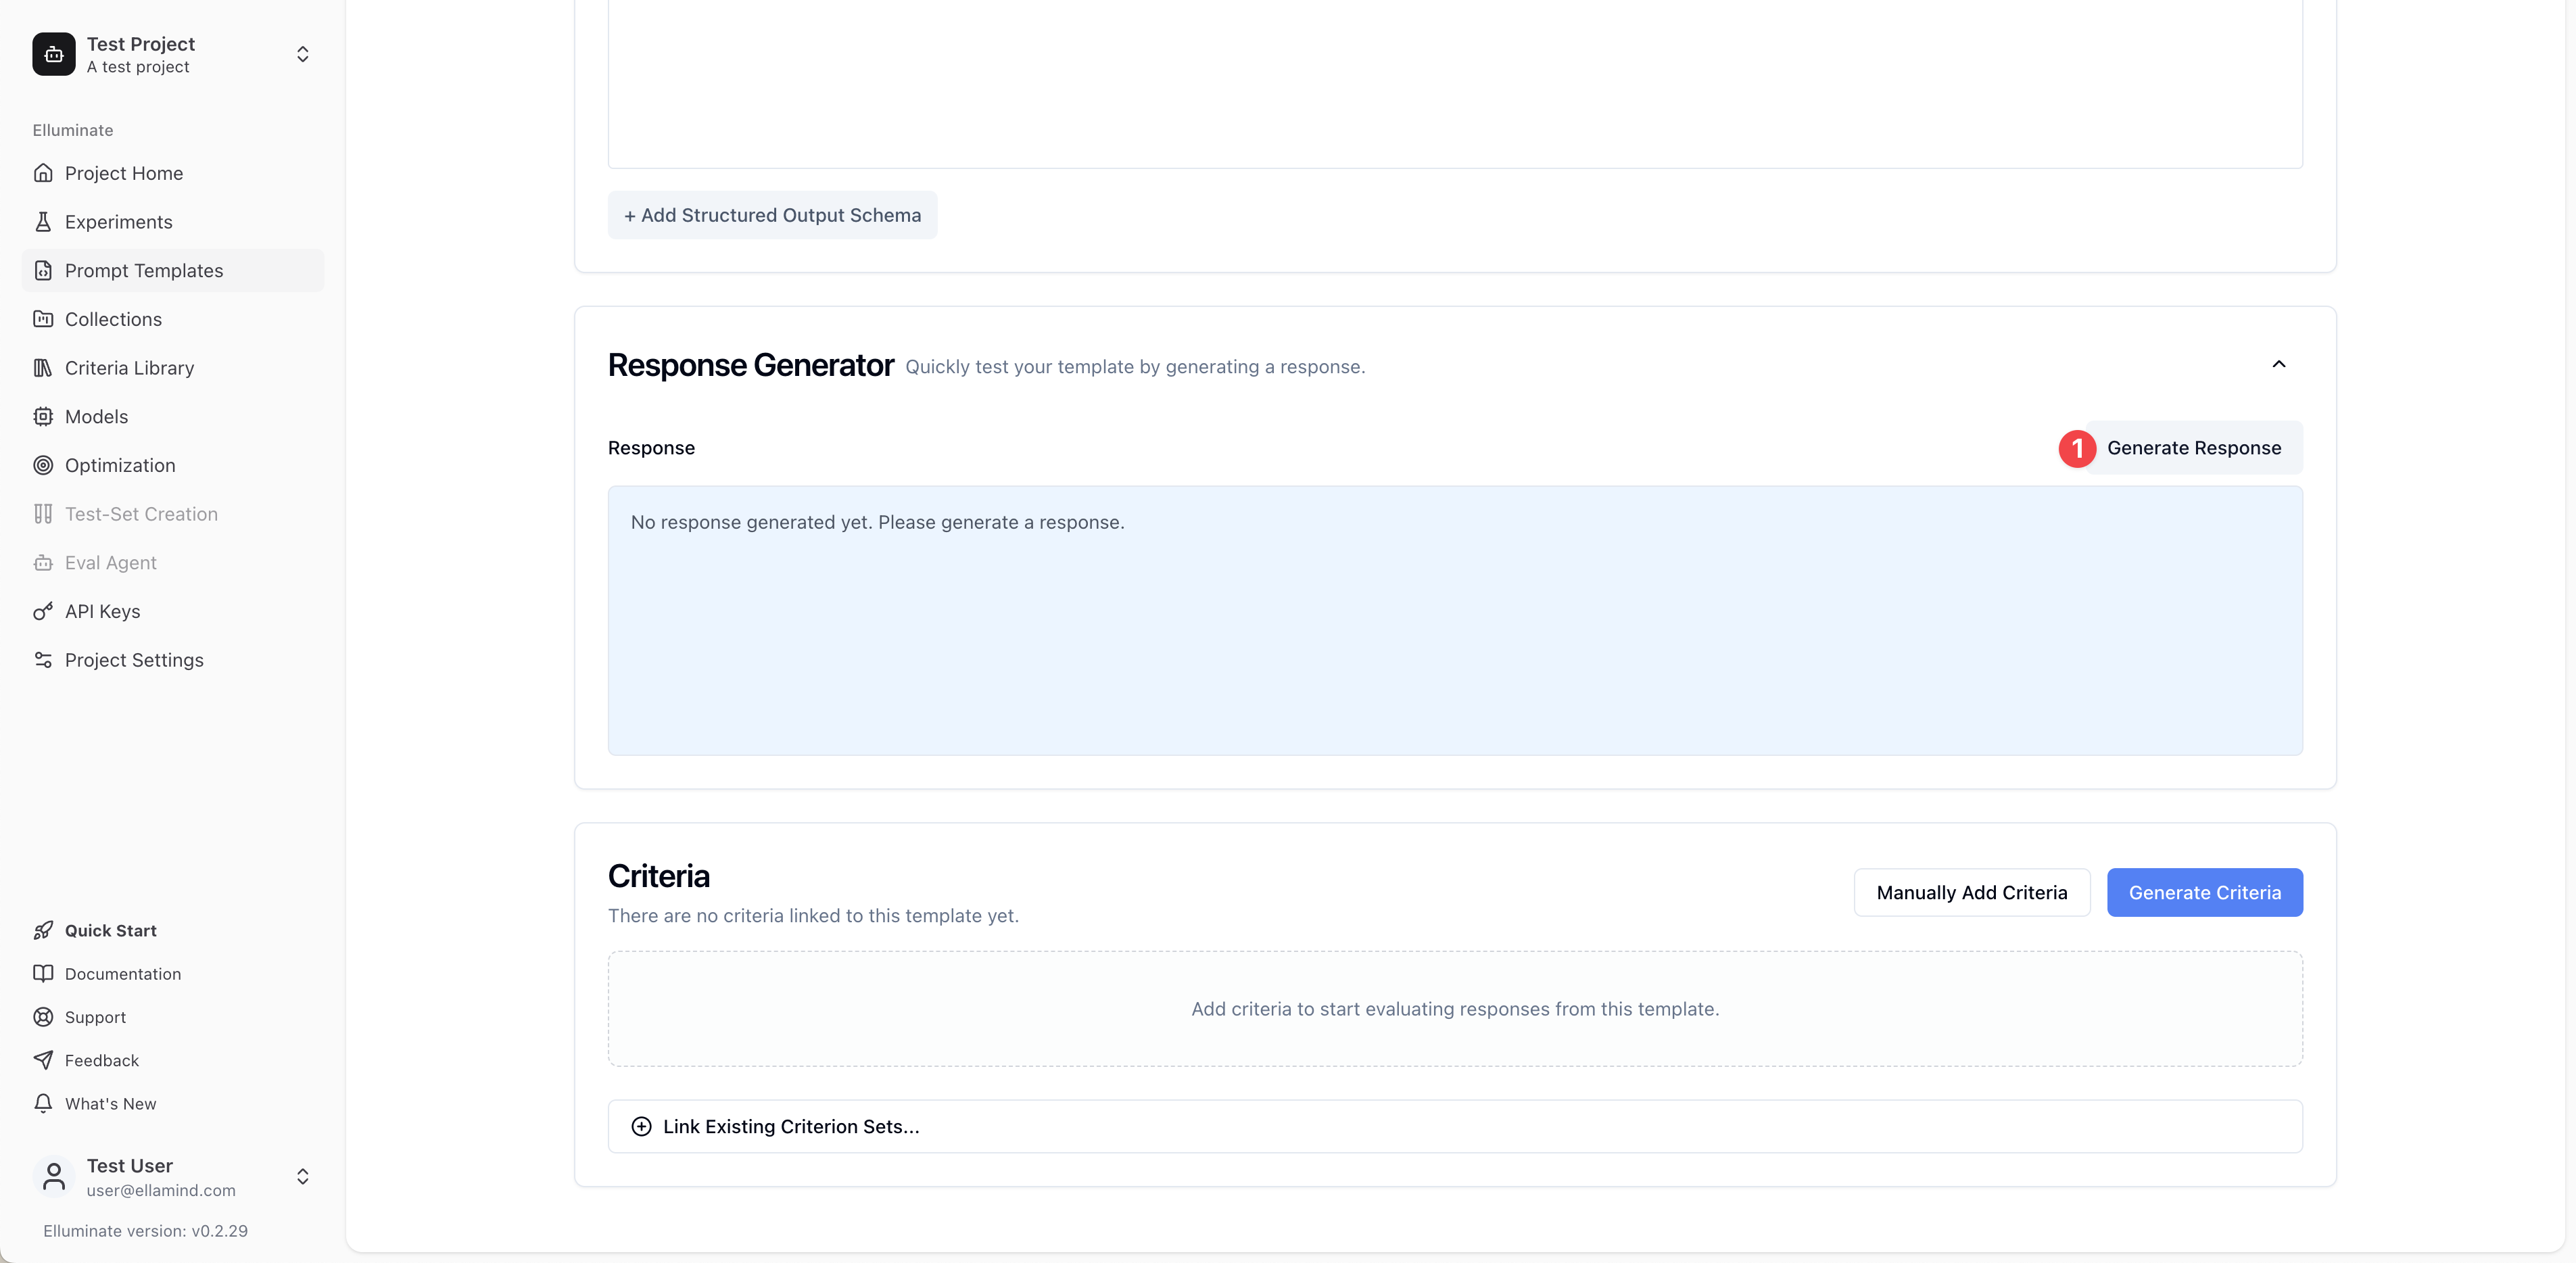
Before creating evaluation criteria, let's quickly test our template using the Response Generator at the bottom of the Template Details page.
1. Scroll down to the Response Generator section at the bottom of the Template Details page, click to expand the section (it's collapsed by default), then click Generate Response to open the response generation form
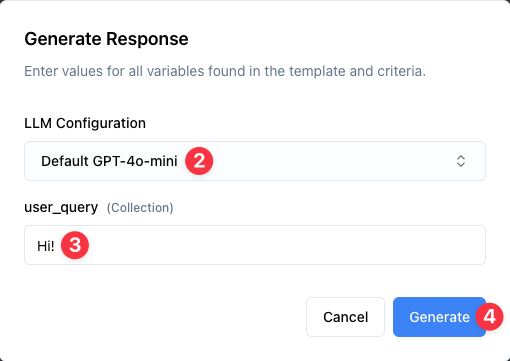
2. Select an LLM Configuration from the dropdown (e.g., "Default GPT-5")
3. Enter a test value for the user_query variable; a simple greeting is fine to begin with: "Hi!"
4. Click Generate to see how your template performs
5. Review the generated response to ensure your template works as expected
Note: The Response Generator allows you to quickly test your template with different variable values to ensure it works as expected before setting up systematic evaluation.
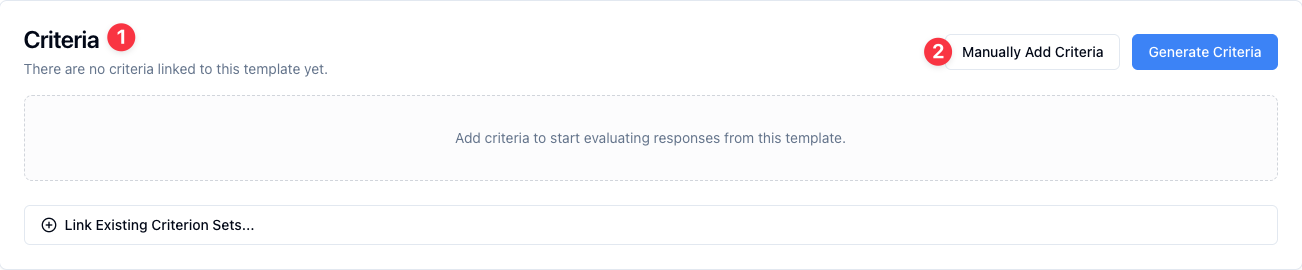
Step 5: Add Evaluation Criteria
The Criteria section offers three ways to add evaluation criteria to your template:
- Create New Criterion Set: Full control when you need specific evaluation requirements
- Generate Criteria: Quick start with AI-generated criteria tailored to your specific prompt
- Link Existing Criterion Set: Save time by reusing a criterion set from your project
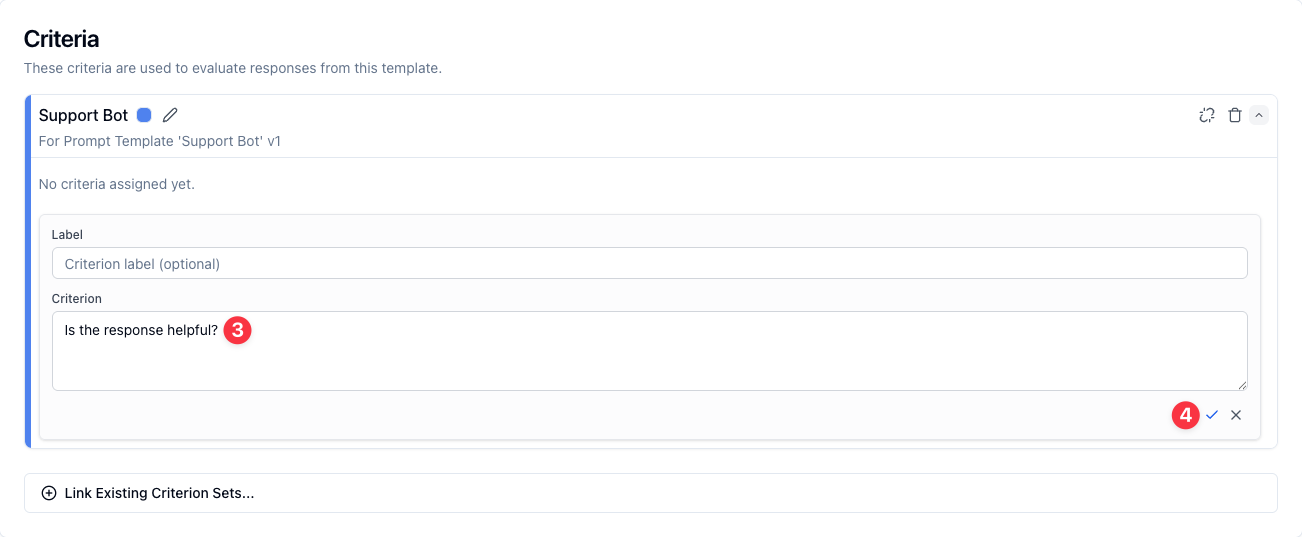
1. In your Prompt Templates view, locate the Criterion Set section below the Response Generator and click on Create New Criterion Set to enter your own evaluation criteria
2. Input a criterion for evaluating responses, such as: "Is the response helpful?"
3. Click the checkmark to save your criterion
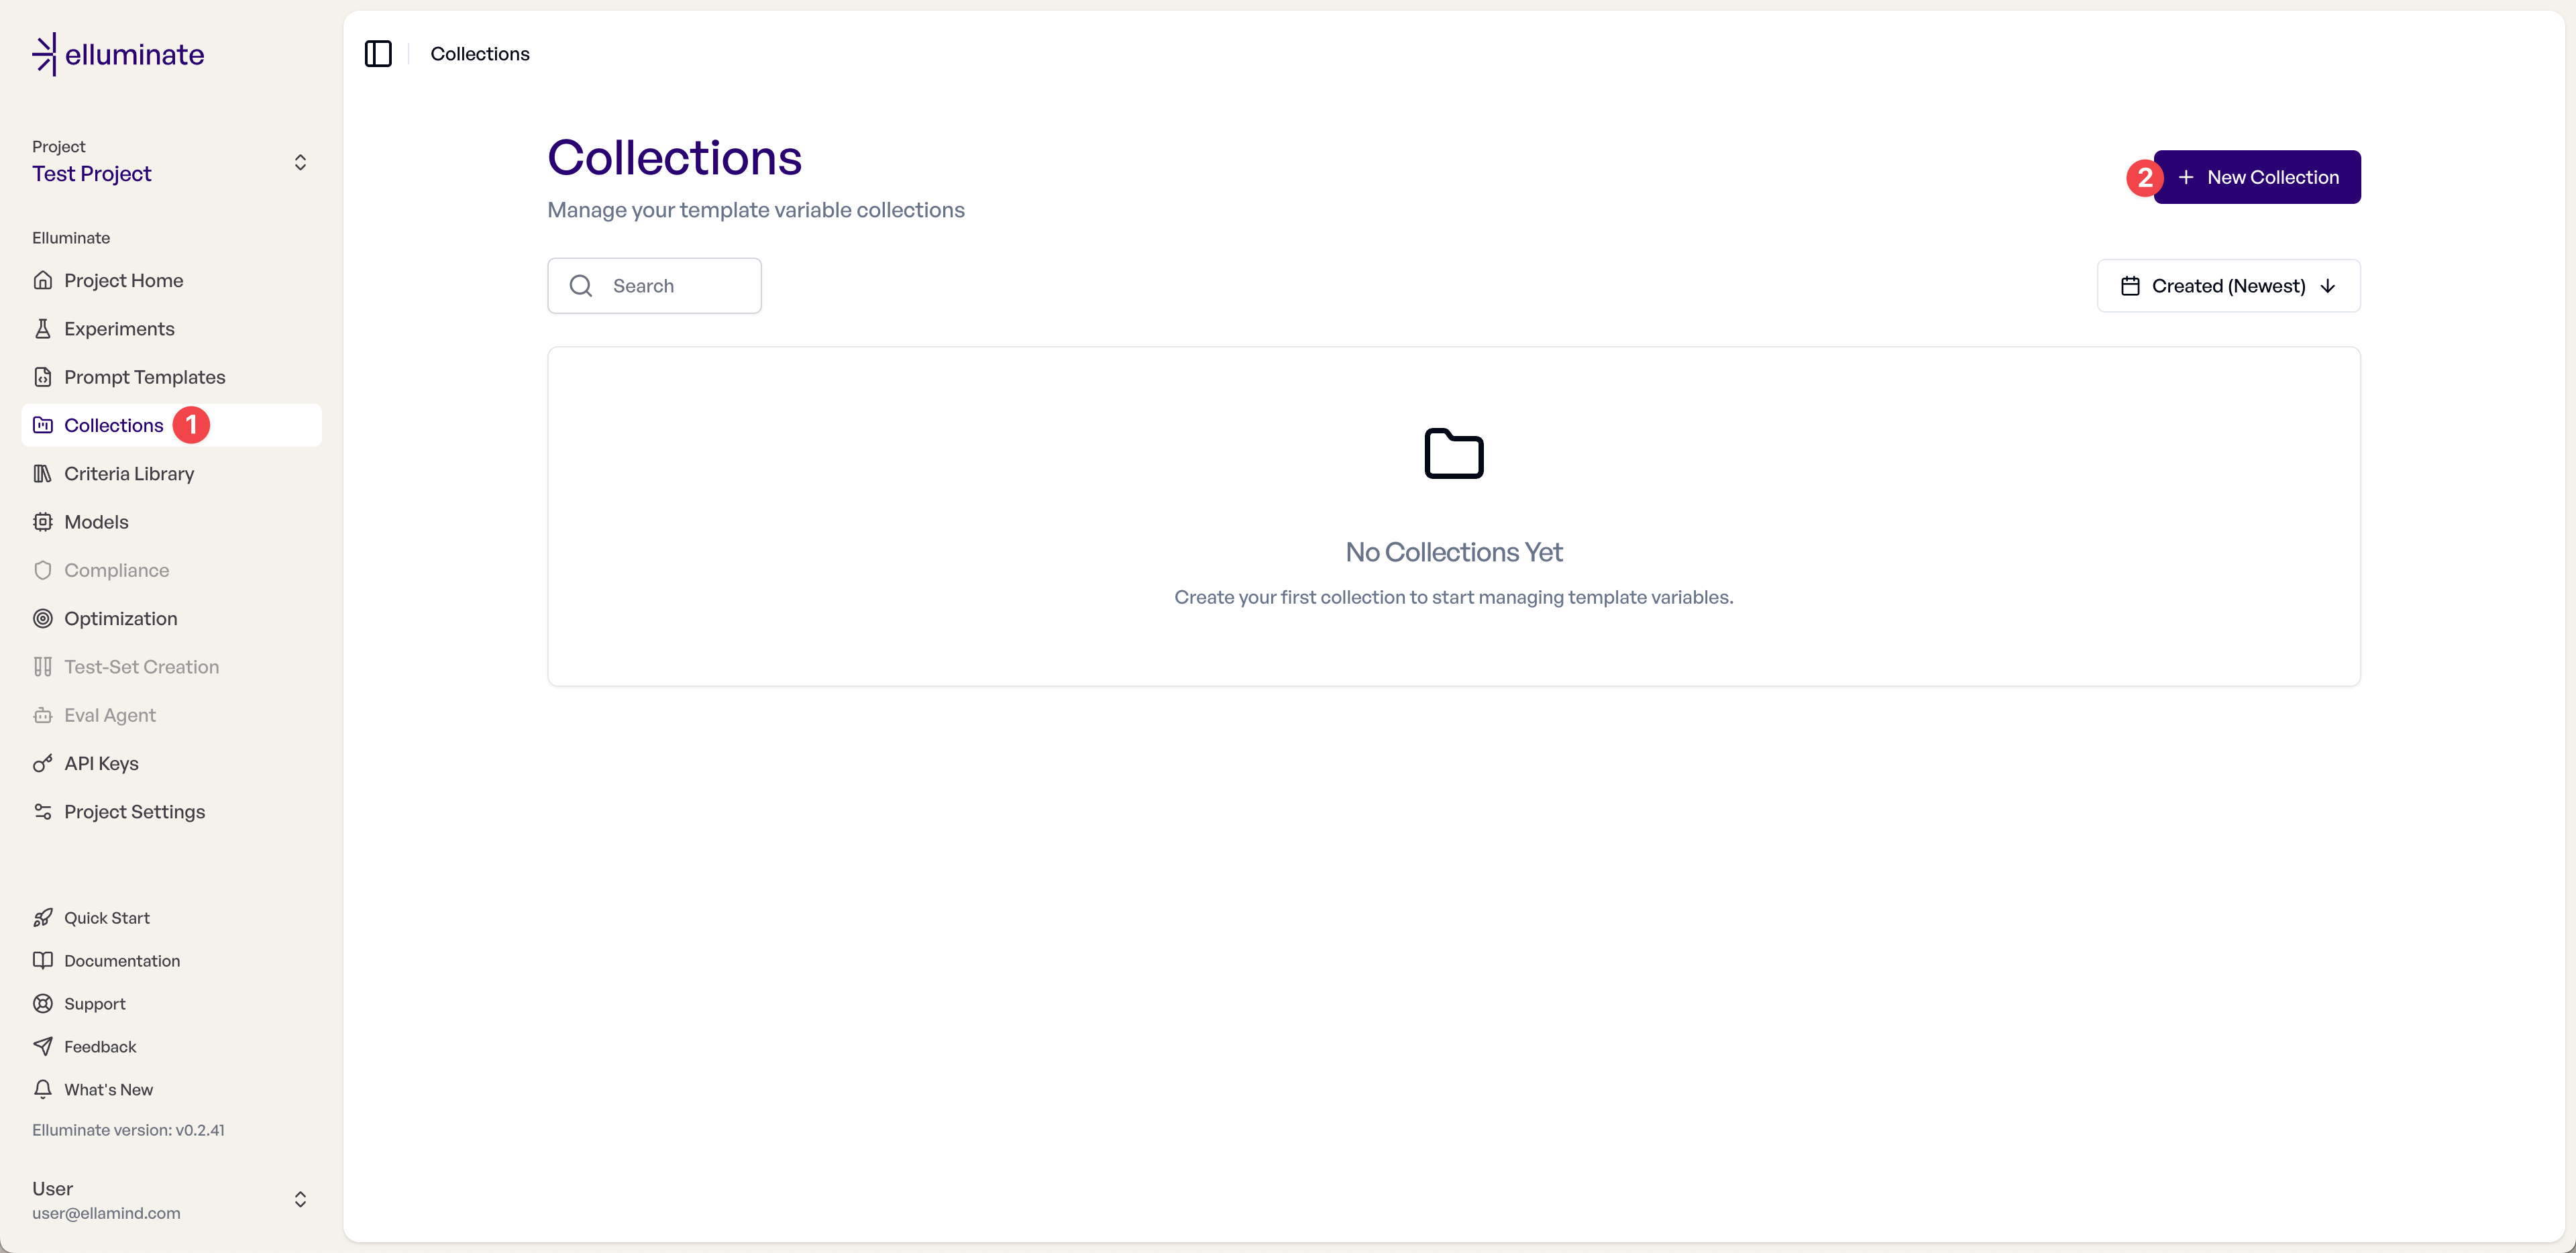
Step 6: Create a Template Variables Collection
Now we need to create a collection to store test cases for systematic evaluation of our prompt template.
1. Navigate to Collections in the sidebar
2. Click New Collection to create a new collection
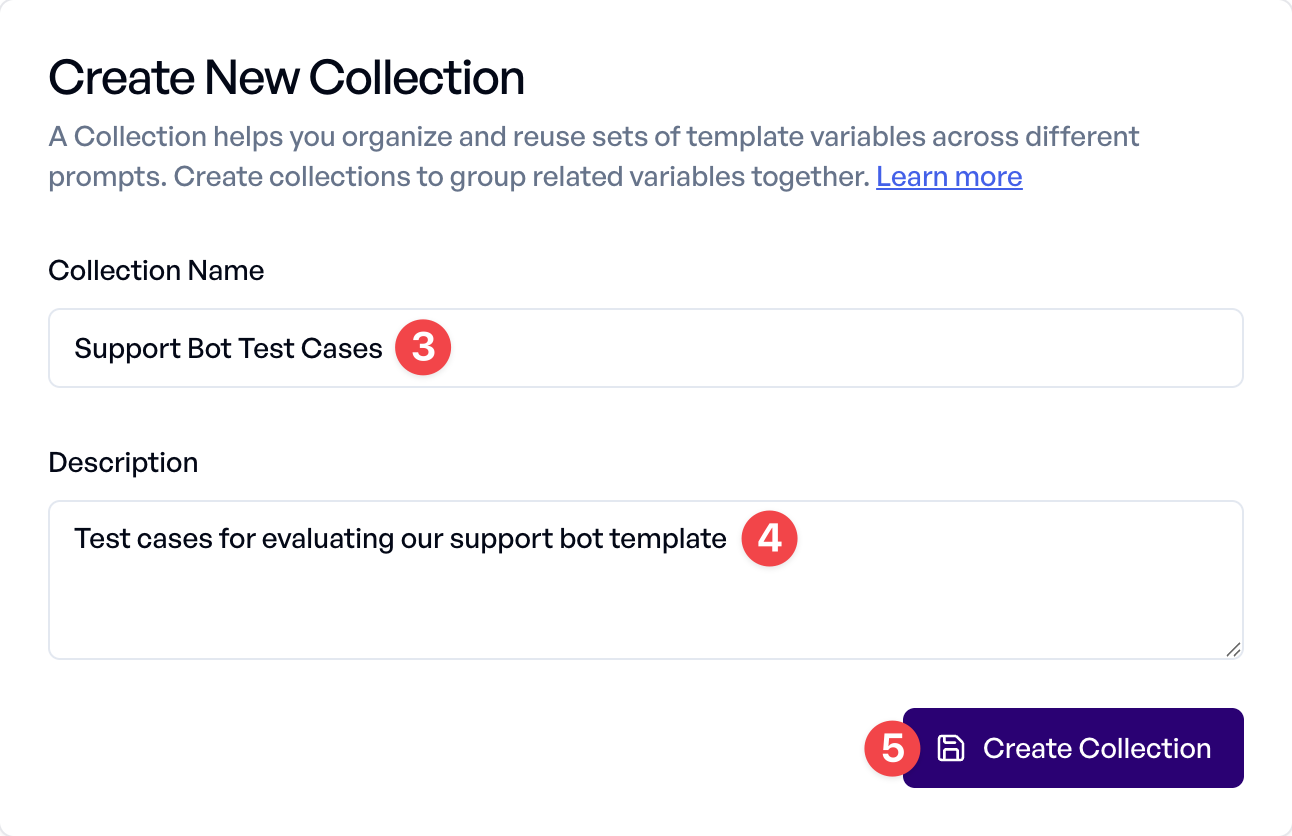
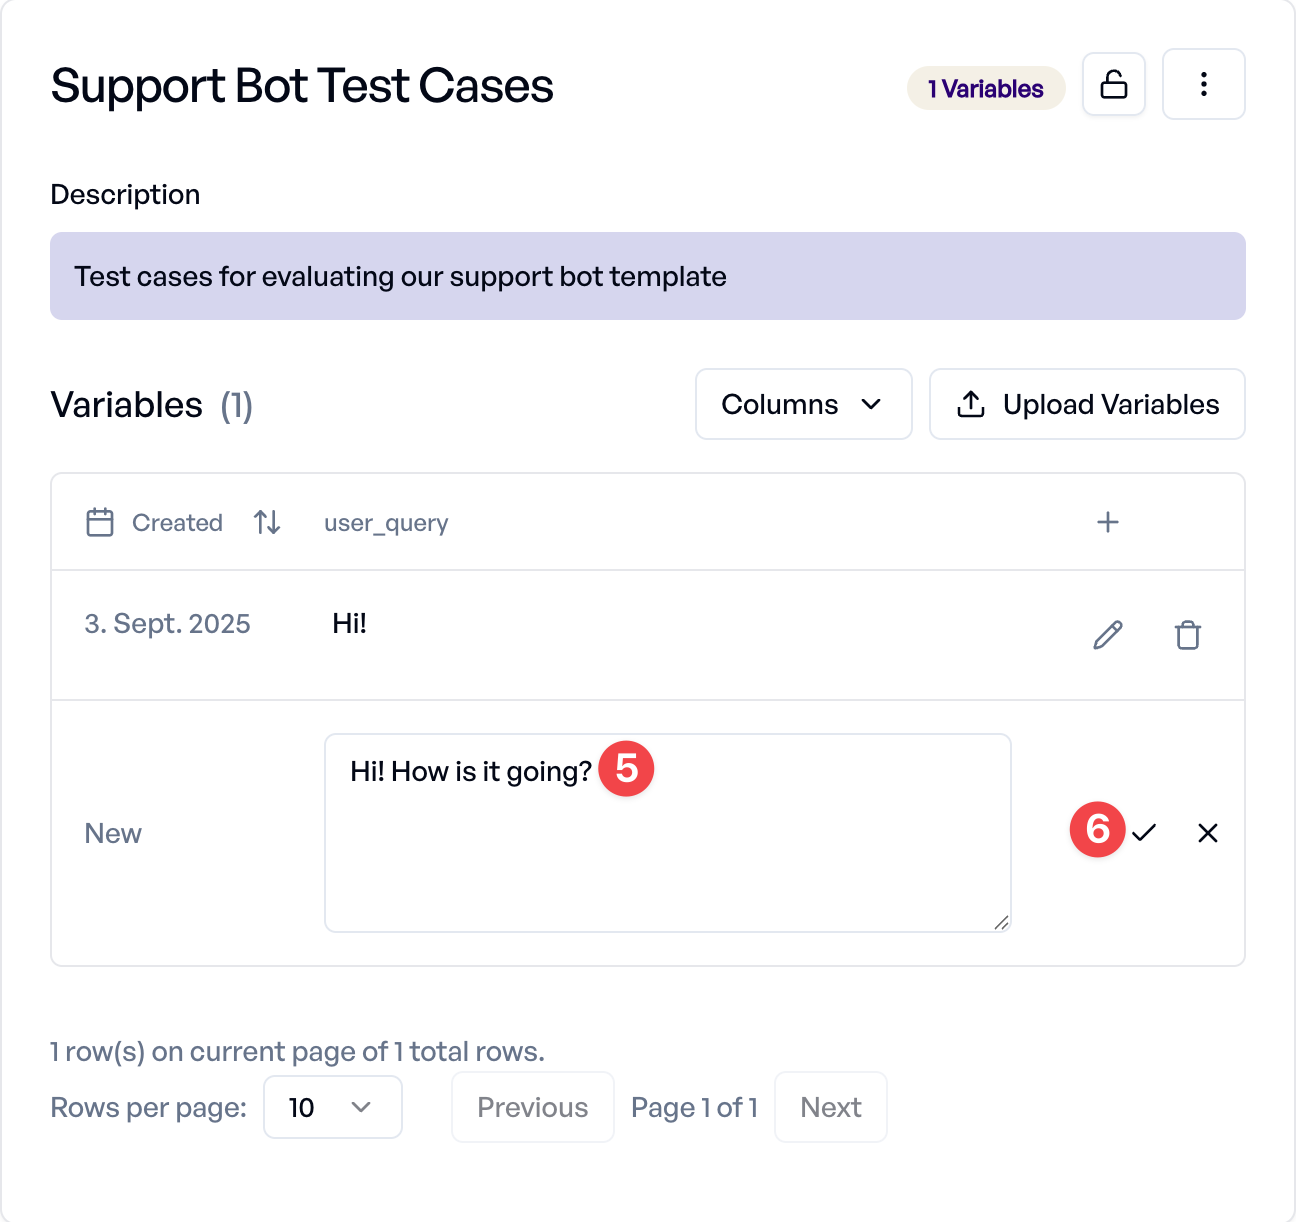
3. Enter the Collection Name: "Support Bot Test Cases"
4. Optionally, add a Description: "Test cases for evaluating our support bot template"
5. Click Create Collection to save your new collection
Step 7: Add Template Variable Values
Now we add test cases to thoroughly evaluate our prompt template.
First, we define the template variable used.
1. Click on the text field "Column 1" and rename it to the template variable "user_query" used in the prompt template.
2. Enter a first value in the text field below "Enter value", for example "Hi!".
3. Click the checkmark to the right to save your changes.
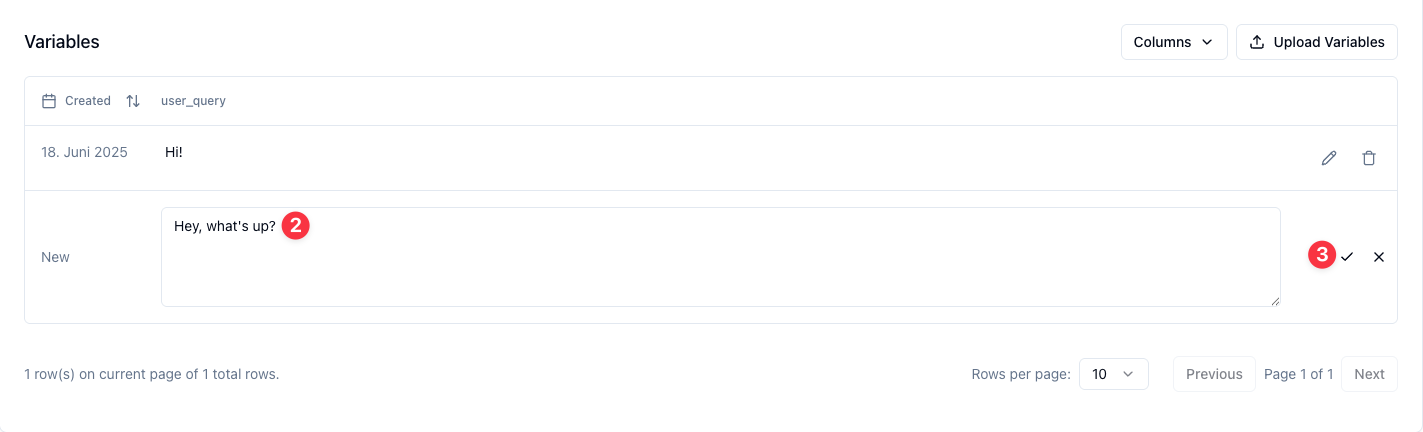
From here, there are two ways to add more values for variables at the end of the collection:
- + button: Manually add values for variables one by one with full control over each value
- ✨ (sparkles) button: Generate values for variables automatically using your prompt template and AI
For this tutorial, let's add test cases manually:
4. Click the + button to manually add a value

5. Add a "user_query" value: "Hi! How is it going?"
6. Click Save to add this value to your collection
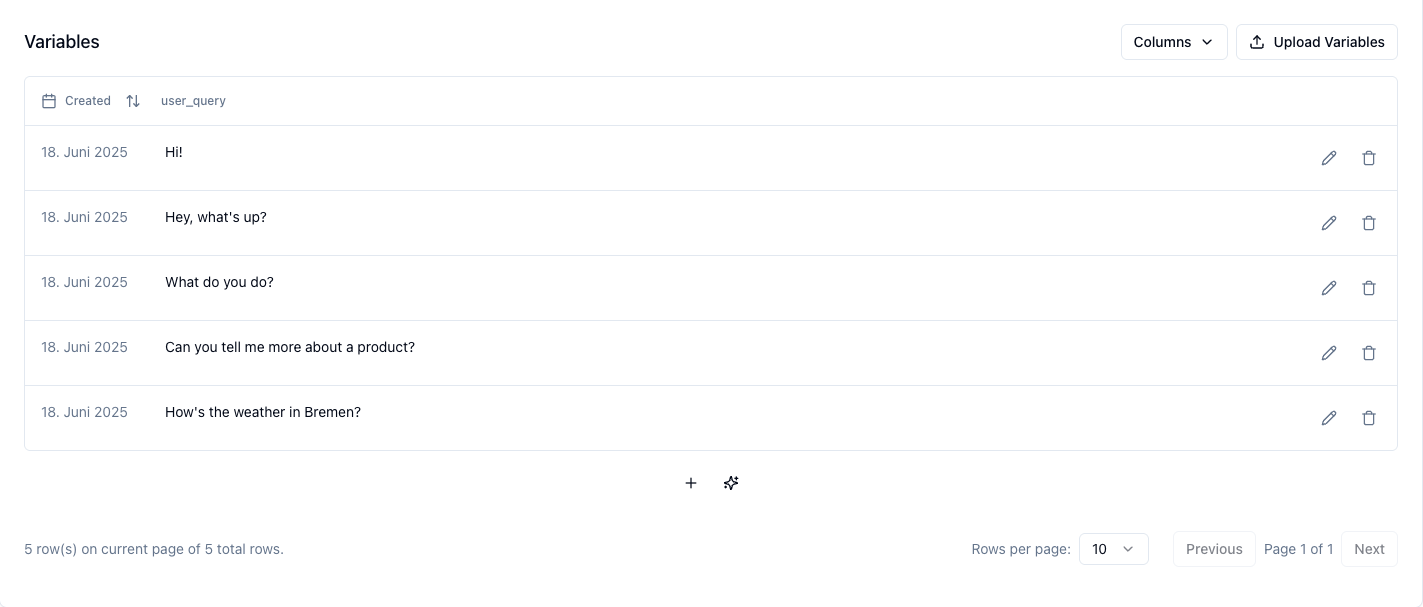
Repeat this process to add more user queries to build a comprehensive test set:
- What do you do?
- Can you tell me more about a product?
- How's the weather in Bremen?
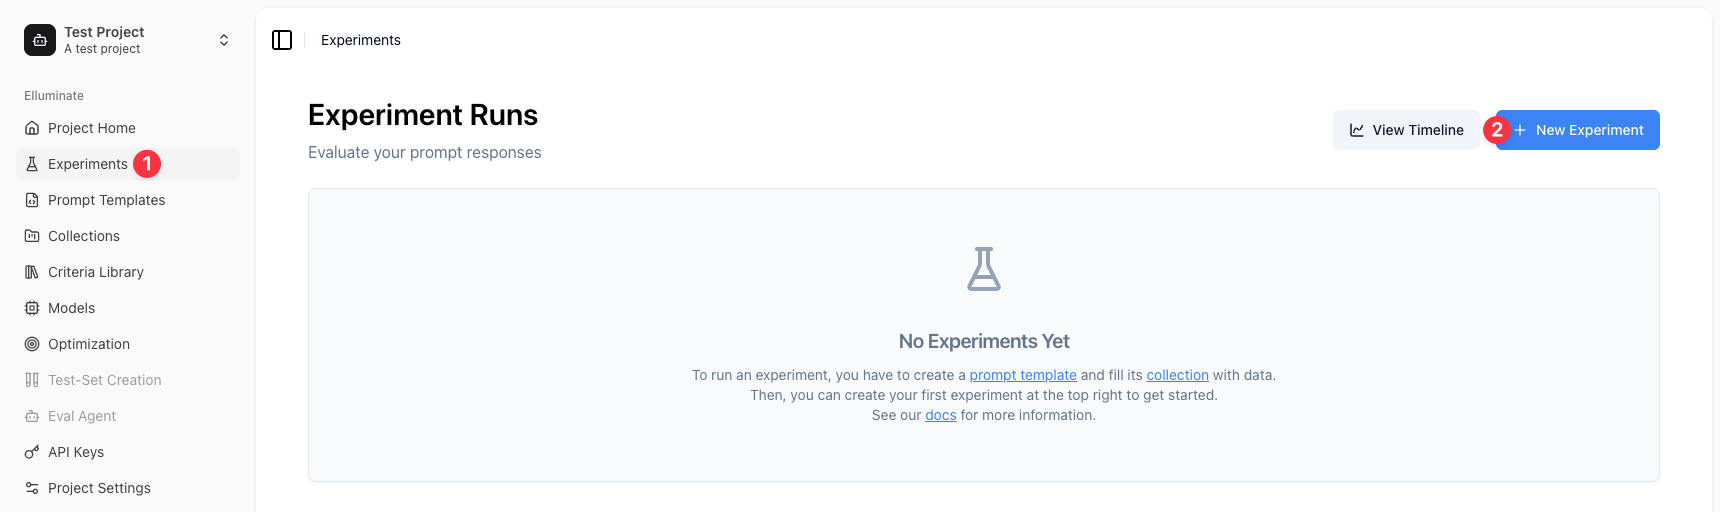
Step 8: Run Your First Experiment
Now that we have all the components in place (prompt template, evaluation criteria, and test cases), let's run a full experiment to evaluate our template systematically.
1. Navigate to Experiments in the sidebar
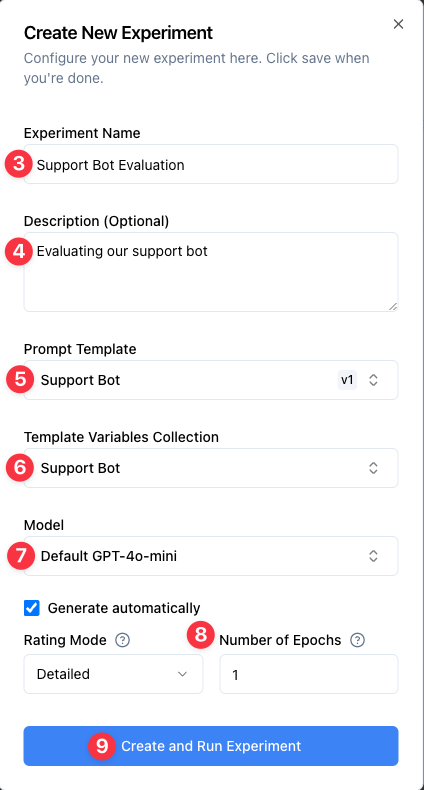
2. Click New Experiment
3. Optionally, enter an Experiment Name: "Support Bot Evaluation" (a name will be auto-generated if left blank)
4. Add a Description (Optional): "Evaluating our support bot"
5. Choose your Collection: "Support Bot Test Cases"
6. Select your Prompt Template: "Support Bot" (v1)
7. Choose a Criterion Set. The criterion set linked to your prompt template is selected by default, but you can choose any criterion set compatible with your collection
8. Select a Model (e.g., "Default GPT-5")
9. Optionally, review the Advanced Settings (keep the defaults for this tutorial):
- Rating Mode: Detailed mode includes reasoning for each criterion and is recommended for better interpretability. Fast mode provides only ratings without explanations and may be slightly faster.
- Epochs: Epochs allow you to run the same evaluation multiple times. This makes the statistics more reliable but can take some time.
- Rating Version: Select the rating model version to use for evaluating responses. Defaults to the version set in your project settings.
10. Click Create and Run Experiment to start the experiment
11. The experiment will automatically generate responses for all your test cases and evaluate them against your criteria

Step 9: View Your Evaluation Results
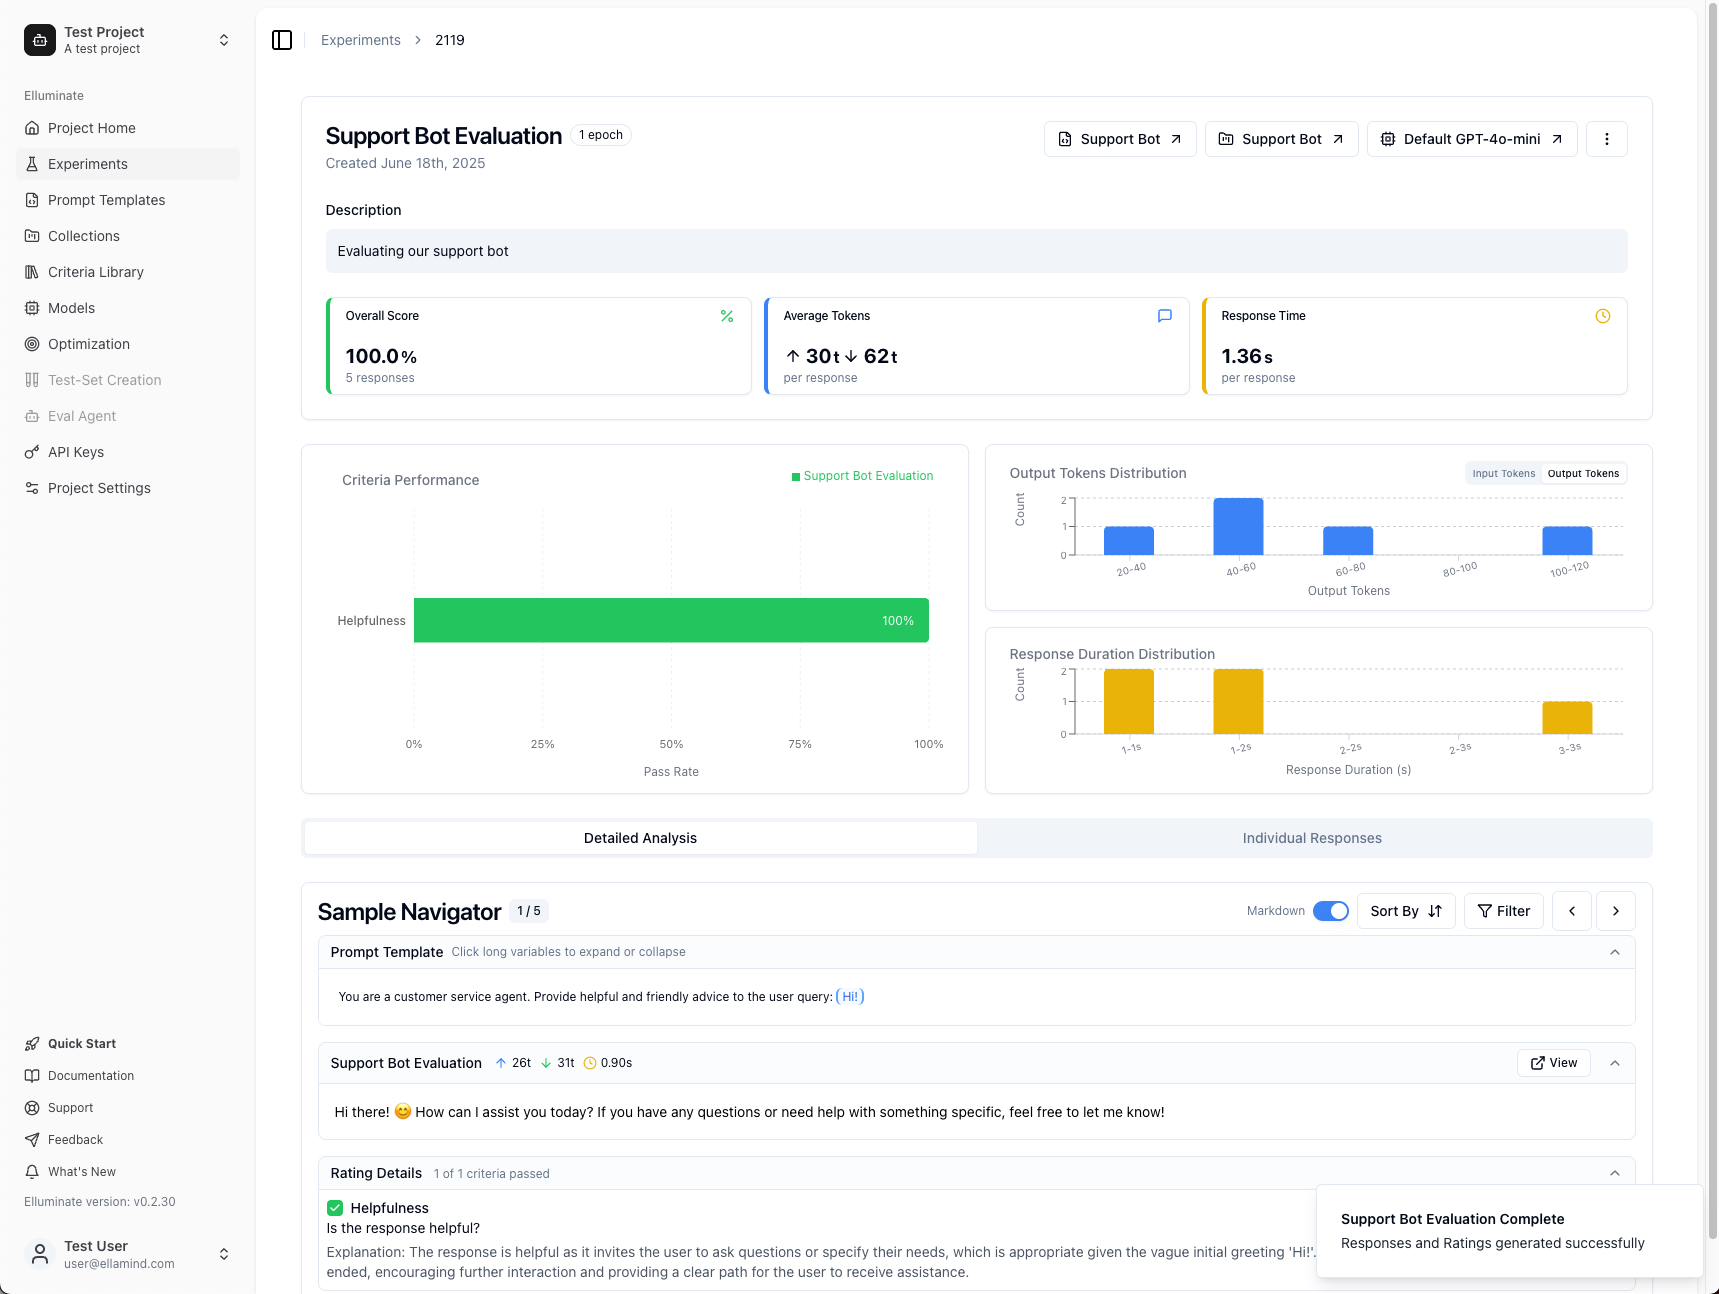
Once your experiment completes, you'll see comprehensive results showing how your prompt template performed across all test cases.
Understanding Your Results
Key Metrics at the Top:
- Overall Score: The percentage of evaluation criteria that passed across all responses (in this example: 100%)
- Average Tokens: Shows input tokens (↑) sent to the LLM and output tokens (↓) generated in responses
- Response Time: Average time the LLM took to generate each response
Criteria Performance (Left Side):
The green bars show how well each evaluation criterion performed:
- 100% means all responses passed that specific criterion
- Lower percentages indicate areas where your prompt could be improved
- Different criteria may have different success rates - this helps you identify which aspects of your prompt work well and which need refinement
Distribution Charts (Right Side):
- Output Tokens Distribution: Shows the spread of response lengths - helps identify consistency
- Response Duration Distribution: Shows timing patterns - useful for performance optimization
- Interactive Filtering: Click on any bar in these charts to filter the Sample Navigator to show only responses within that range
Analyzing Individual Responses
Sample Navigator (Bottom Section):
This powerful tool lets you examine each test case in detail:
- Navigation: Use the arrow buttons or keyboard (←→) to browse through your test cases (the counter shows your current position)
- Markdown Toggle: Switch between formatted and plain text views of responses
- Sort By: Order results by rating, token count, or response time
- Filter: Focus on specific criteria or hide perfect responses
Two Analysis Modes:
- Detailed Analysis: In-depth view of individual responses with full context and criterion-by-criterion breakdown
- Individual Responses: Table view showing all responses at once for quick comparison
Interpreting Your Results
Use these results to understand your prompt template's performance:
If you see high scores (80%+ across criteria):
- Your prompt template is working well
- Consider testing with more challenging or diverse examples
- You can confidently use this template for similar tasks
If you see mixed or lower scores:
- Look at the criteria with lower percentages to identify improvement areas
- Use the Sample Navigator to examine specific failing cases
- Refine your prompt template based on common failure patterns
- Run additional experiments to test your improvements
Important for all results:
- Spot-check passing samples - Even when responses pass your criteria, examine a random sample to verify your evaluation criteria align with what you actually consider successful
- This helps ensure your criteria aren't too lenient or missing important quality aspects
Expanding Your Evaluation:
Regardless of your initial results, here are ways to improve your evaluation process:
- Try different LLM configurations to compare performance
- Add more diverse test cases to stress-test your template
- Experiment with different evaluation criteria to capture other quality aspects
Next Steps
Now that you've completed your first evaluation using the web interface:
- Set up Experiment Schedules to automatically run evaluations on a regular basis and get notified if performance drops
- Follow our SDK Quick Start to learn how to run the same workflows using the elluminate CLI and Python SDK
- Explore Experiments to run systematic evaluations
- Learn about Criterion Sets to create custom evaluation criteria
- Try Batch Processing to evaluate multiple responses at once
- Understand Key Concepts for a deeper dive into elluminate's features
What You've Accomplished
- ✅ Created a prompt template with placeholders
- ✅ Tested your template using the Response Generator
- ✅ Added evaluation criteria manually
- ✅ Built a template variables collection with test cases
- ✅ Added additional test variables manually
- ✅ Run a complete experiment with systematic evaluation
- ✅ Analyzed comprehensive results using advanced tools
- ✅ Learned to interpret performance metrics and distributions
You're now ready to scale up your evaluation workflows with elluminate!
Support
If you need help with the elluminate platform, contact us by email at [email protected].