Projects
Projects serve as containers for all your prompt templates, collections, criterion sets, experiments, and allow you to manage your team members.
By organizing your work in Projects, you can control and share exactly what you want with every team member.
Working with Projects
Each project maintains its own set of resources and configurations, that means, separate:
- Prompt Templates - Version-controlled prompt definitions
- Collections - Test data and variable sets
- Experiments - Evaluation results and metrics
- Criterion Sets - Quality evaluation criteria
- LLM Configurations - Model settings and API keys
Resources created within a project are only accessible when that project is active and can be shared across team members.
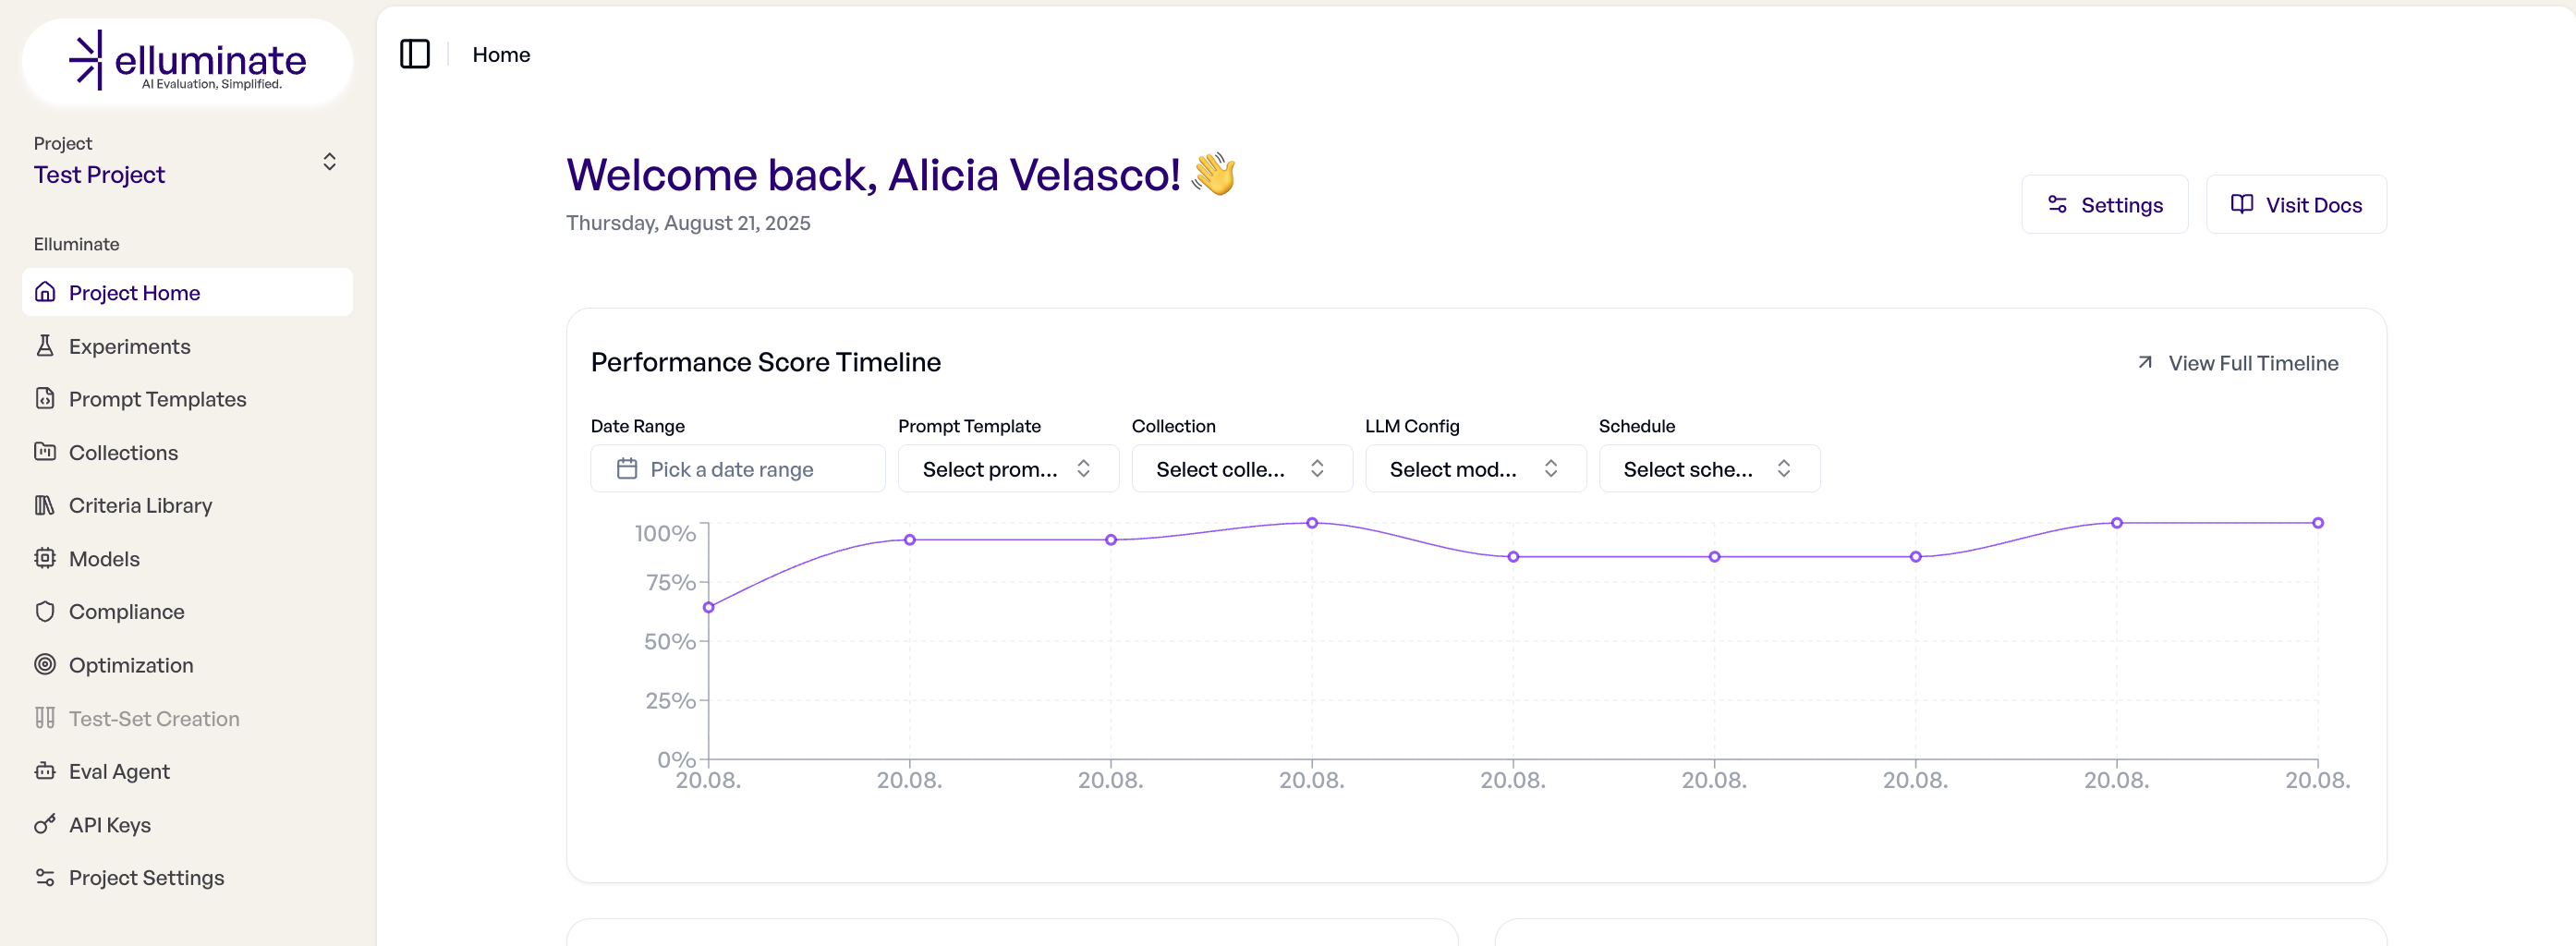
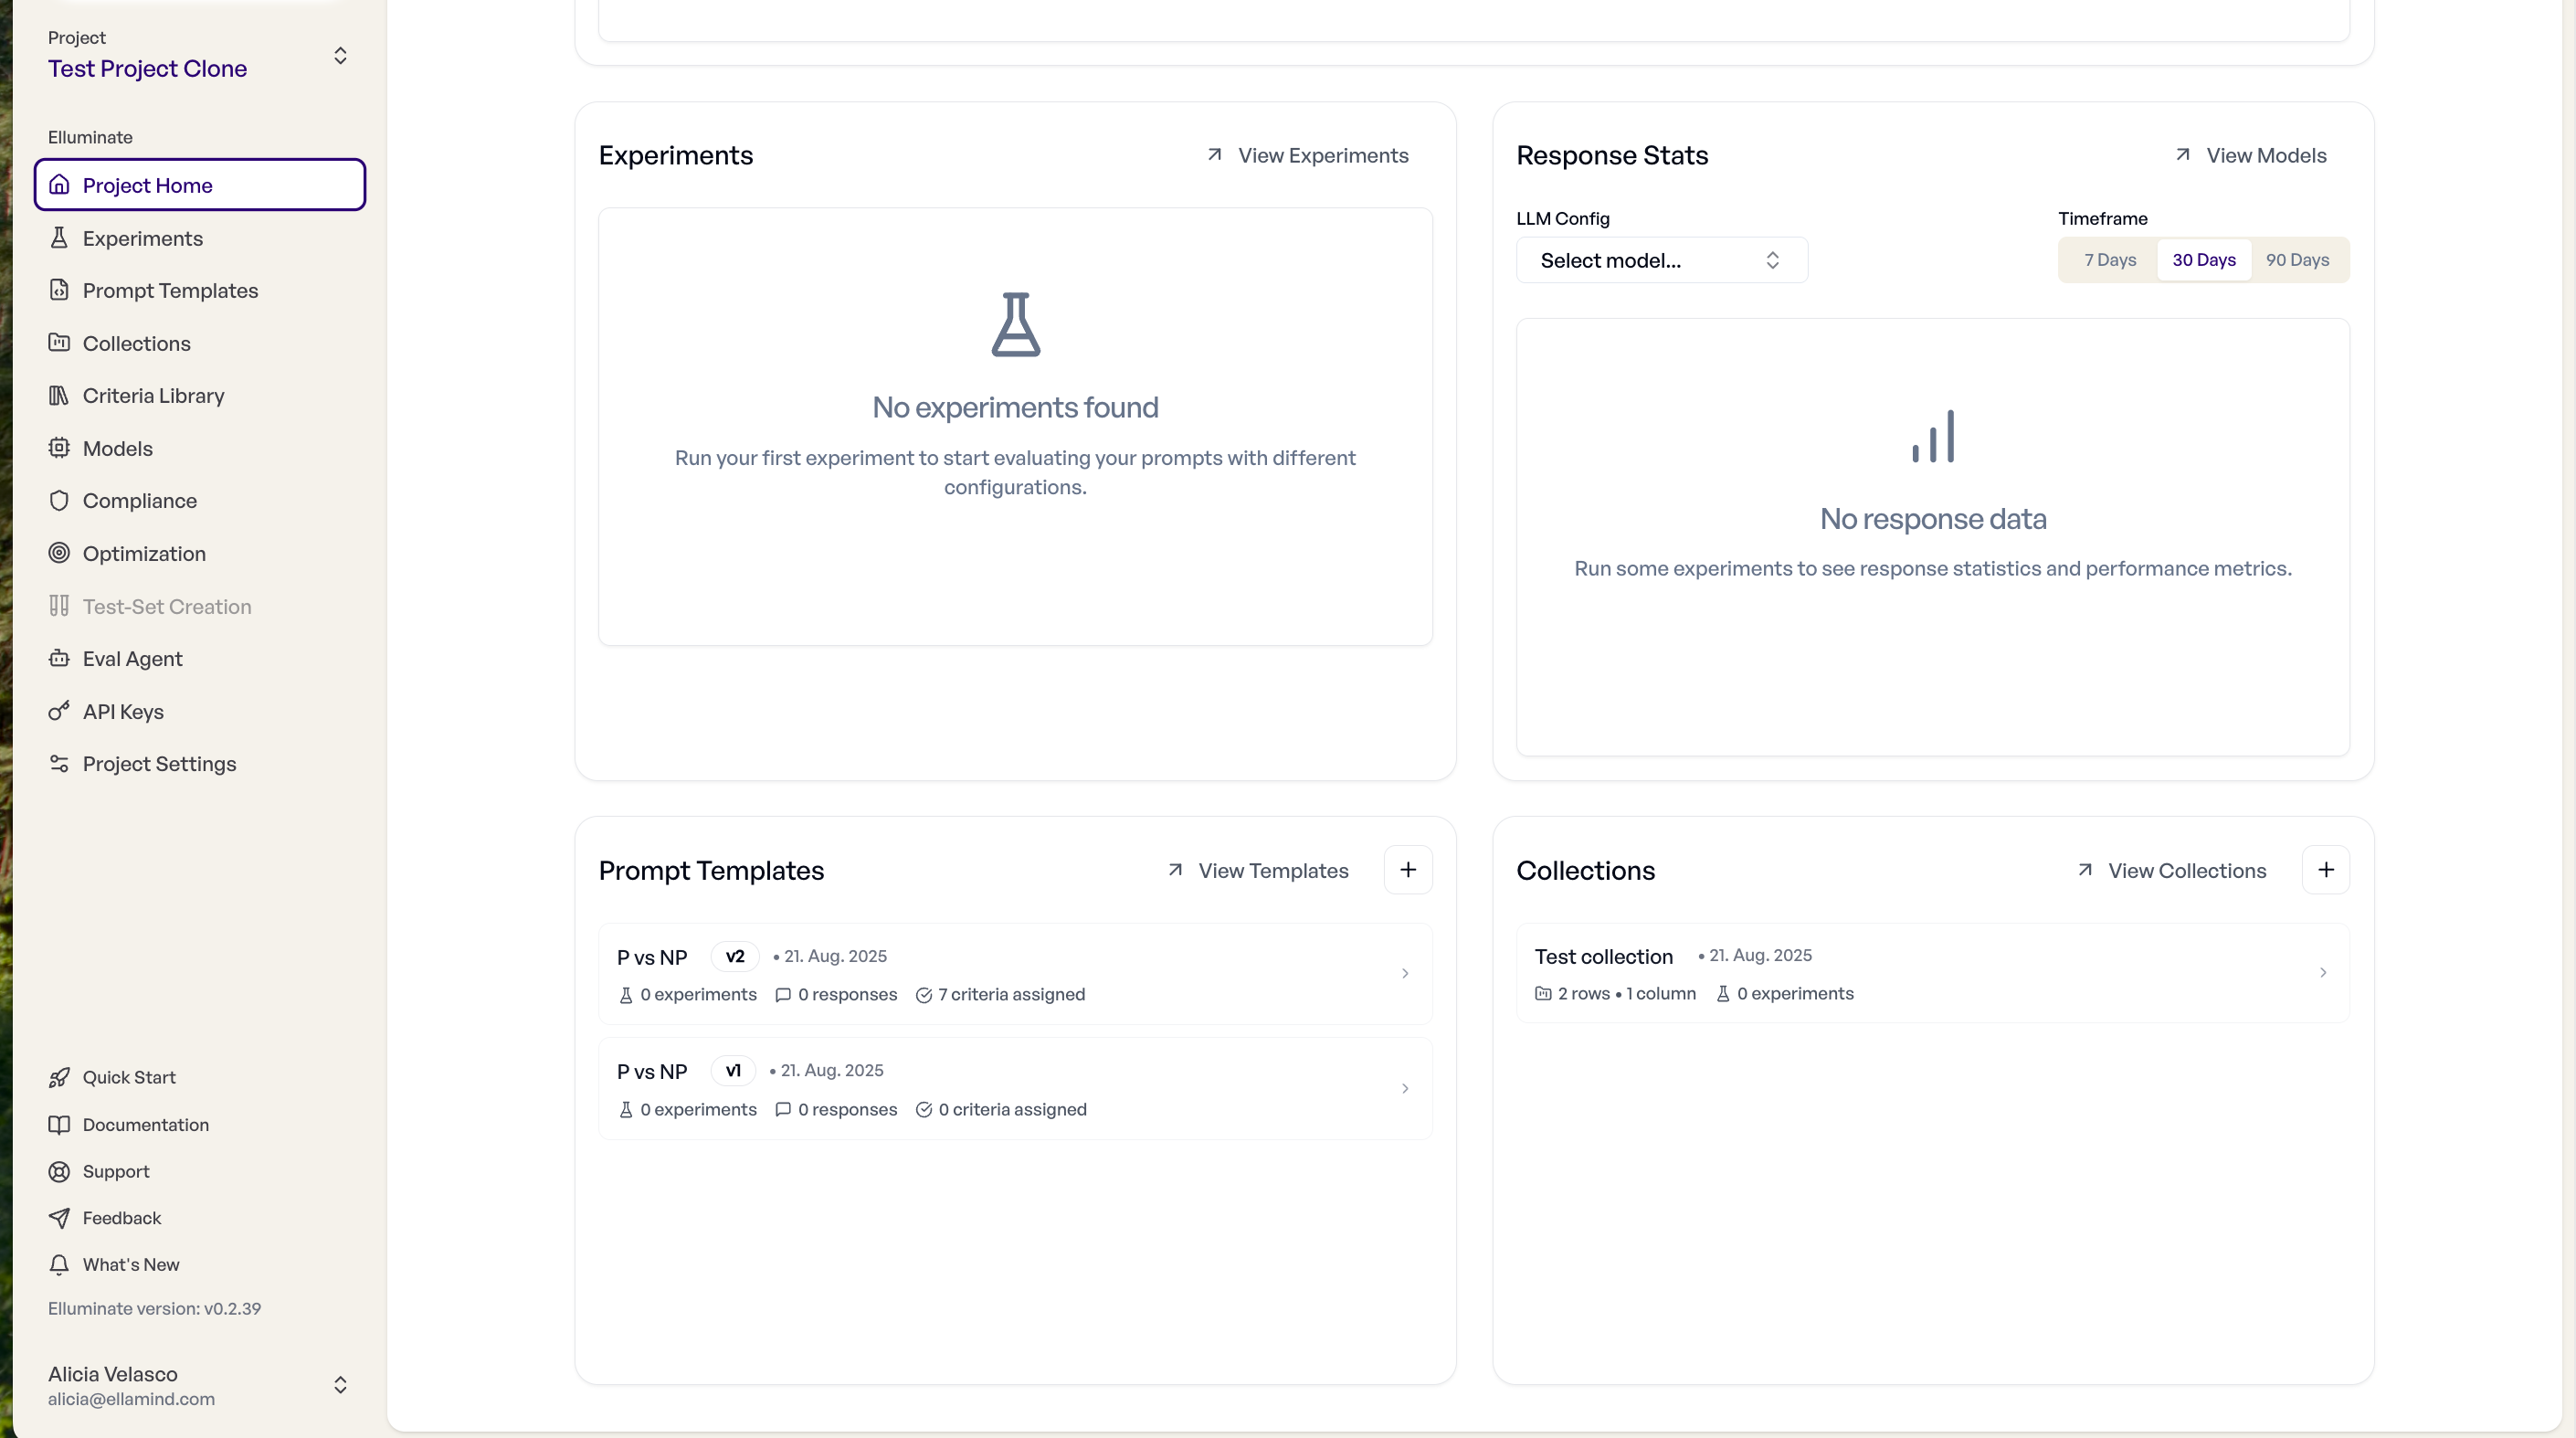
When you open a project, it will show you an overview of the experiments performance timeline and response stats as well as links to your prompt templates, collections and experiments.
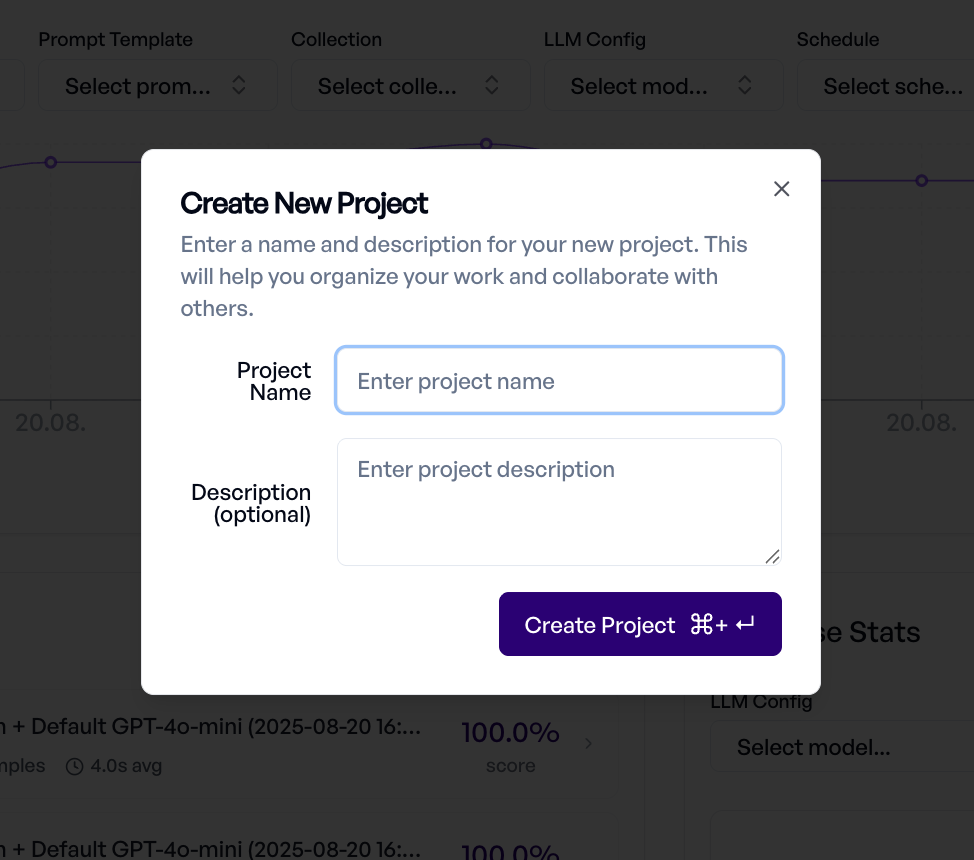
Creating Projects
When you create a new project, it becomes your active workspace where all new resources are automatically associated:
Project Settings
Access the project configuration options through the settings panel to customize how your project operates.
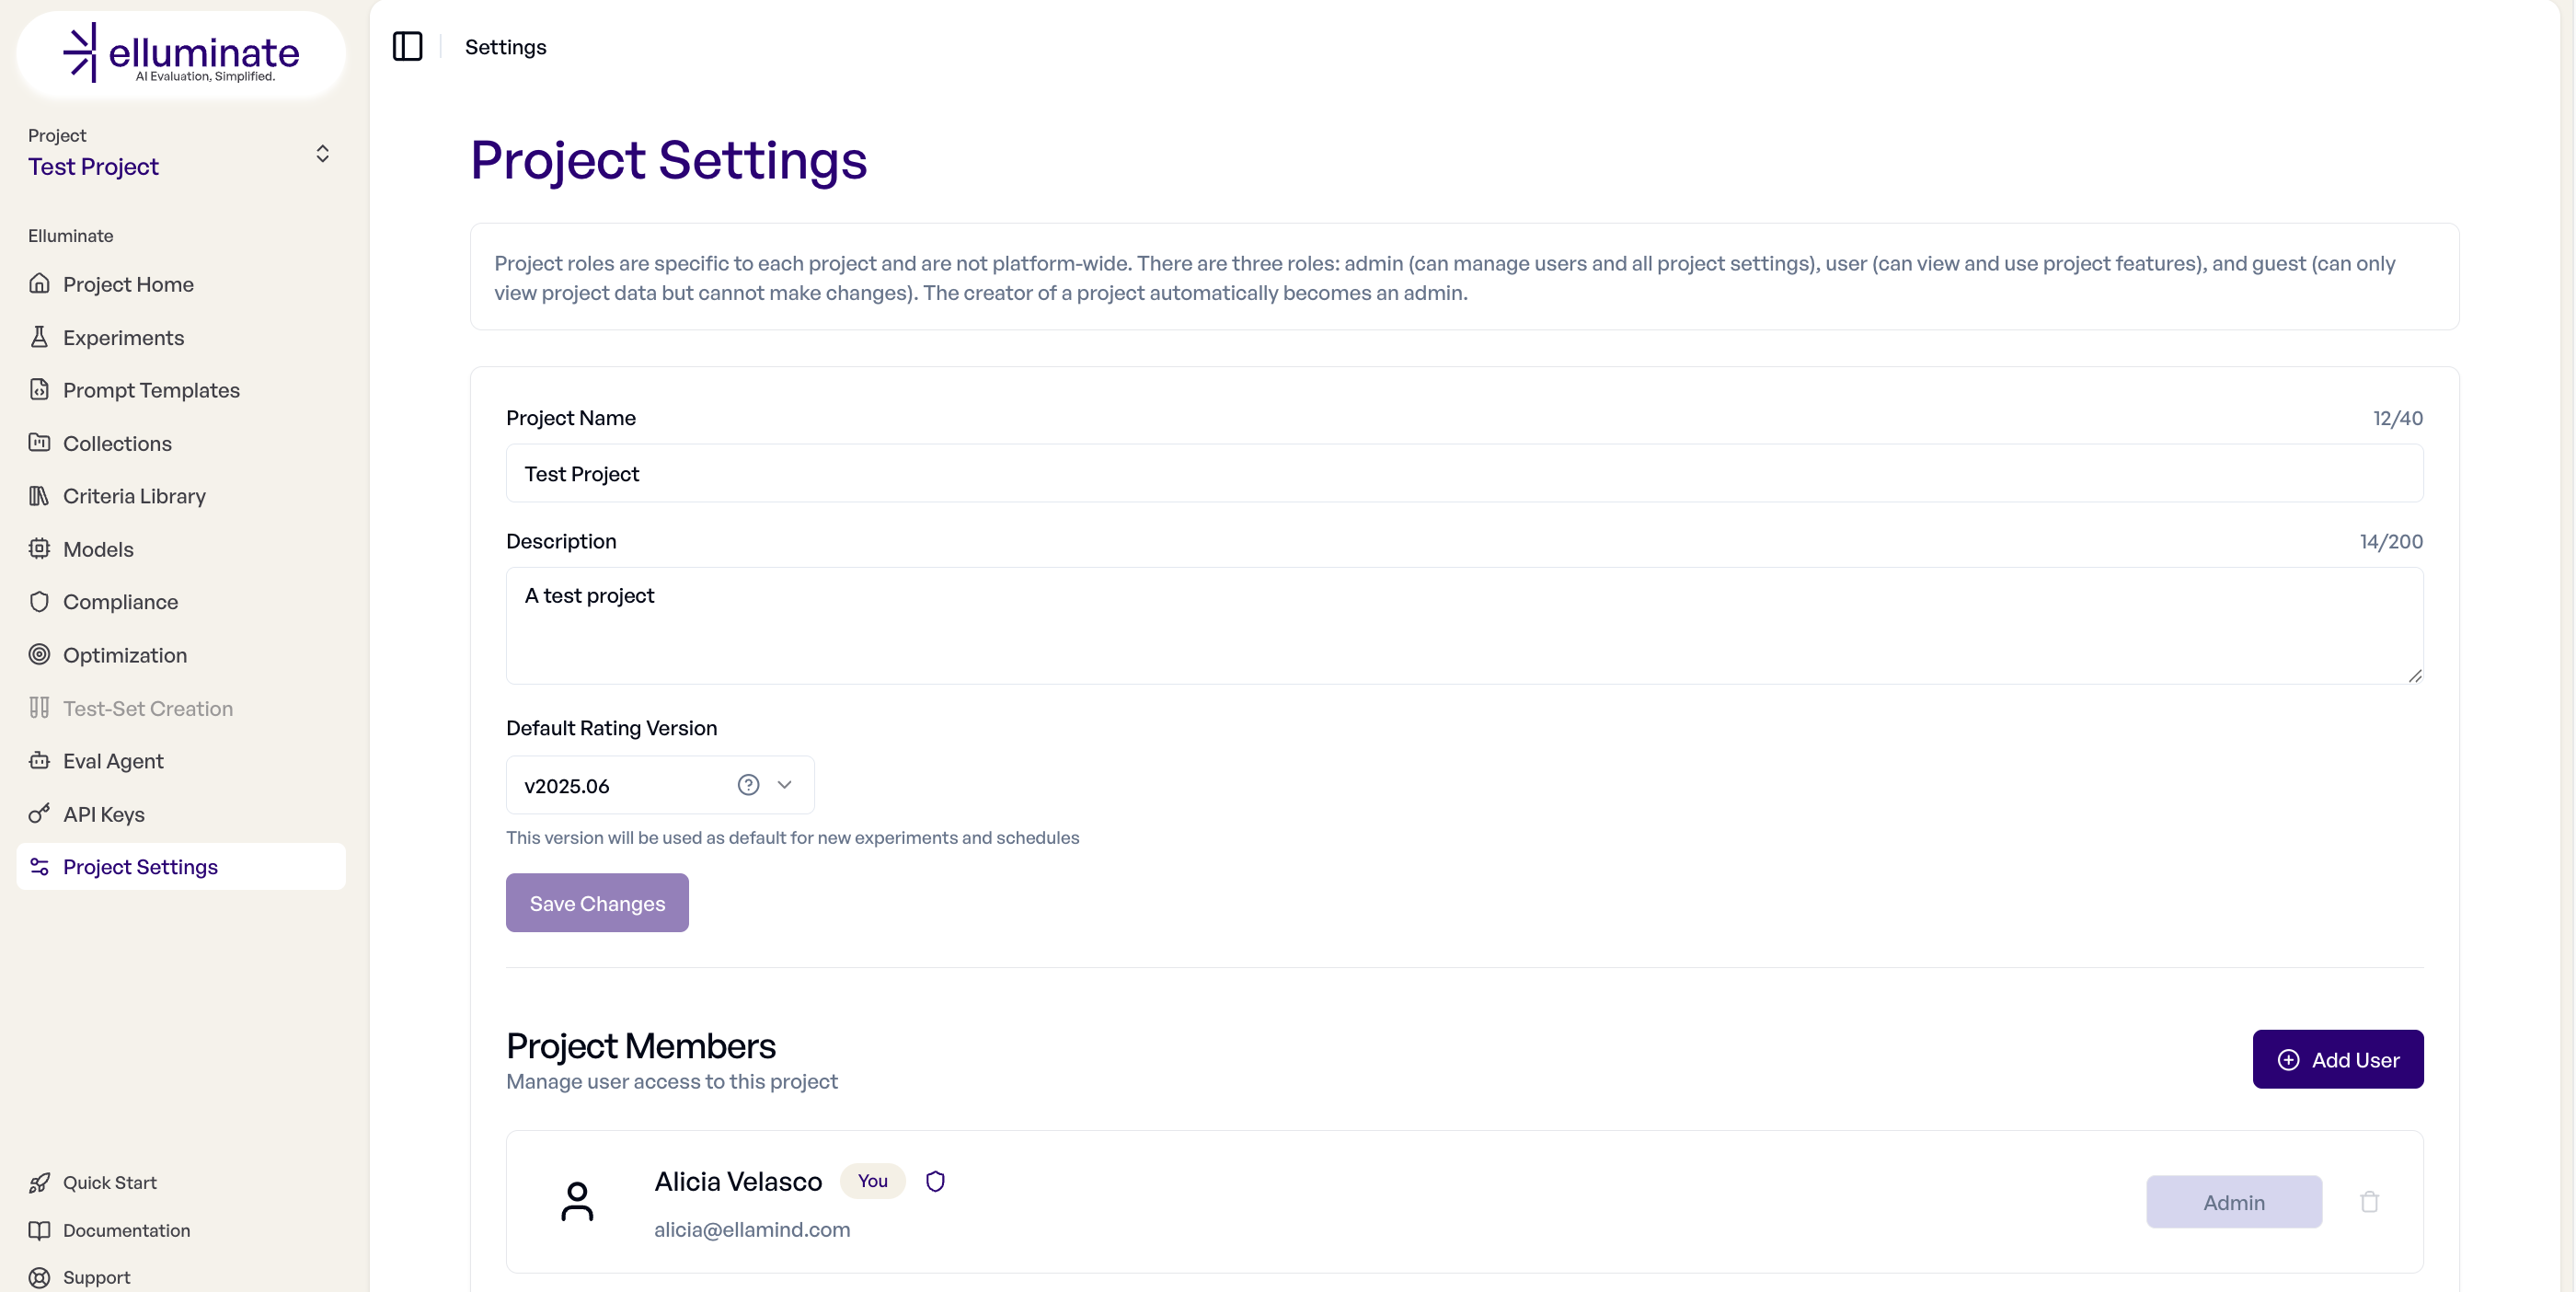
Project name and description can be changed here.
Project Visibility
Projects can be either private or public within your organization. New projects are private by default.
- Private projects: Only project members can view or access the project.
- Public projects: Everyone in this organization, except for guest members, can view and access the project without an explicit invite. Guest organization members must still be explicitly added to the project to gain access.
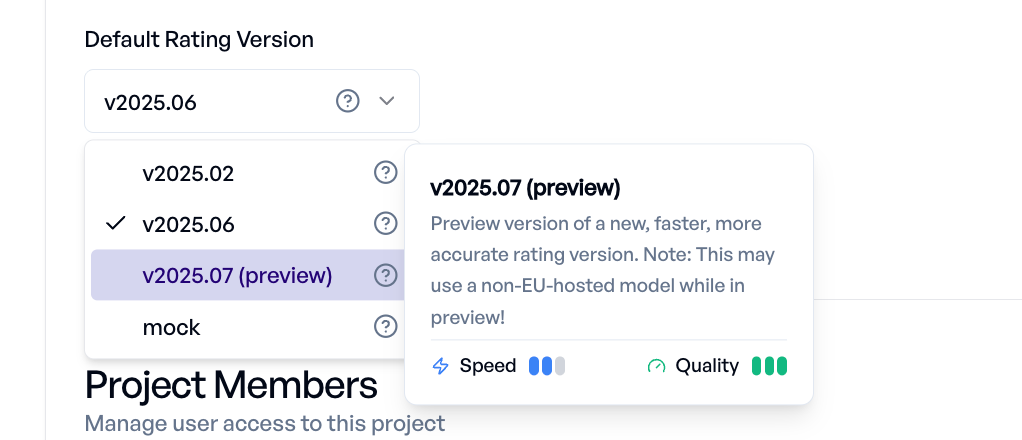
Default Rating Version
Control the rating version used in your experiments for the whole project. You can find and change your version in the Project Settings
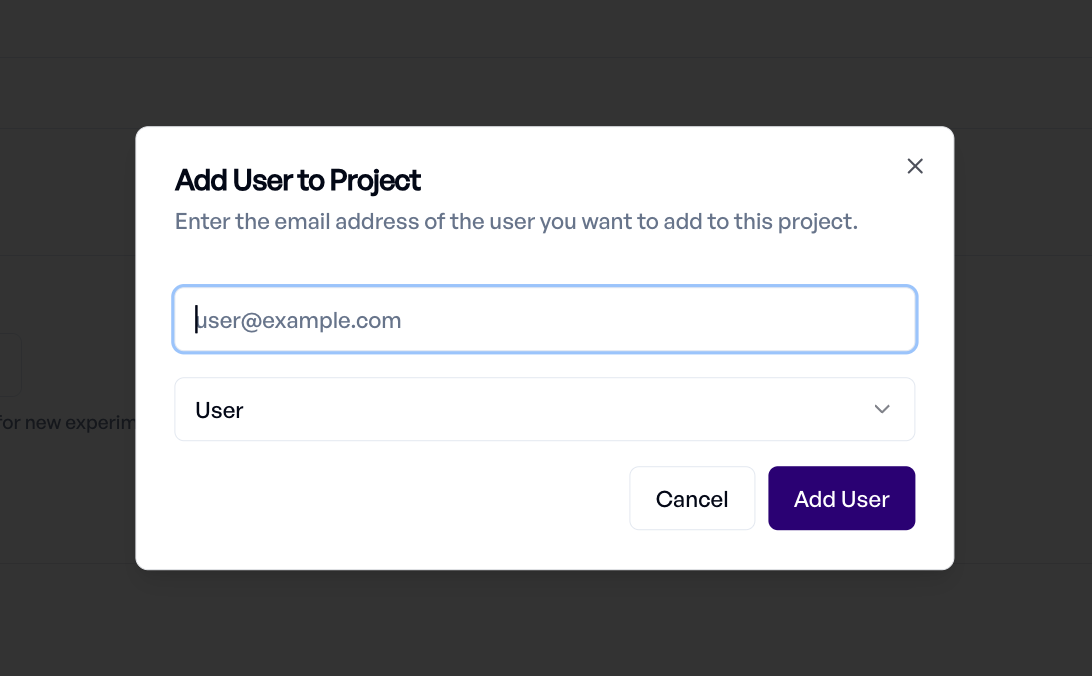
User Management
Add team members to projects and manage their permissions from Project Settings:
Permission Levels
| Permission | Admin | Editor | Viewer |
|---|---|---|---|
| View project resources | ✓ | ✓ | ✓ |
| Create and modify resources | ✓ | ✓ | ✗ |
| Run experiments | ✓ | ✓ | ✗ |
| Manage project settings | ✓ | ✗ | ✗ |
| Add/remove users | ✓ | ✗ | ✗ |
| Delete project | ✓ | ✗ | ✗ |
Advanced features
SDK Integration
The elluminate SDK provides access to project information and management through the client. Currently, the SDK automatically loads the project associated with your API key:
from elluminate import Client

# Initialize client - automatically loads the project associated with your API key
client = Client()

# Access the current project
current_project = client.project
print(f"Current project: {current_project.name}")
print(f"Project ID: {current_project.id}")
print(f"Description: {current_project.description}")

# Get project details
print(f"Created: {current_project.created_at}")
print(f"Updated: {current_project.updated_at}")
Note: The current SDK automatically loads the project associated with your API key. For advanced project management features like creating multiple projects, cloning, or user management, please use the web interface or direct API calls.
For direct API access to project management endpoints, you can use:
import httpx

# List all projects (requires appropriate permissions)
response = httpx.get(
    "https://app.elluminate.de/api/v0/projects",
    headers={"X-API-Key": "your-api-key"}
)
projects = response.json()

# Get specific project details
project_id = 123
response = httpx.get(
    f"https://app.elluminate.de/api/v0/projects/{project_id}",
    headers={"X-API-Key": "your-api-key"}
)
project_details = response.json()
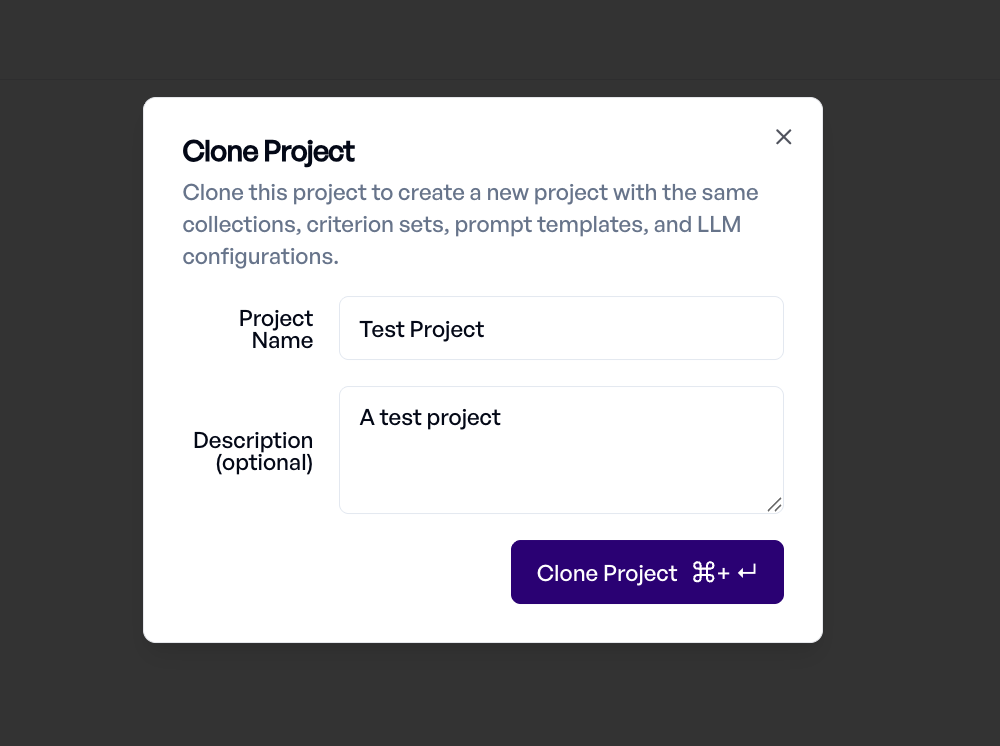
Cloning Projects
You can Clone existing projects from the Project Settings to create variations while reusing resources to save effort:
Deleting Projects
Only project Admins can delete a project. This action is irreversible and should be approached with extreme caution.
What Gets Deleted:
- All prompt templates in the project
- All collections and test data
- All experiments and evaluation results
- All criterion sets and configurations
- All LLM configurations
⚠️ Data Cannot Be Recovered
Once deleted, this data cannot be recovered. We strongly recommend exporting critical data before proceeding with deletion.
Additional Resources
Best Practices
Project Structure
- To get started, use our curated Demo project as a playground
- Create separate projects for different use cases or domains
- Use descriptive names that indicate the project's purpose
- Maintain a consistent naming convention across your organization
Getting Help
- Check the Key Concepts for fundamental understanding
- Review Experiments for evaluation workflows
- Consult Collections for test case management
- Contact support for technical issues or platform limitations