LLM Configs
Configure and manage the language models powering your evaluations
Overview
elluminate offers some LLM models configured by default and allows you to connect any further language model to your projects — from popular providers like OpenAI to your own custom AI applications. This flexibility enables you to test prompts across different models, monitor your deployed AI systems, and optimize for cost and performance.
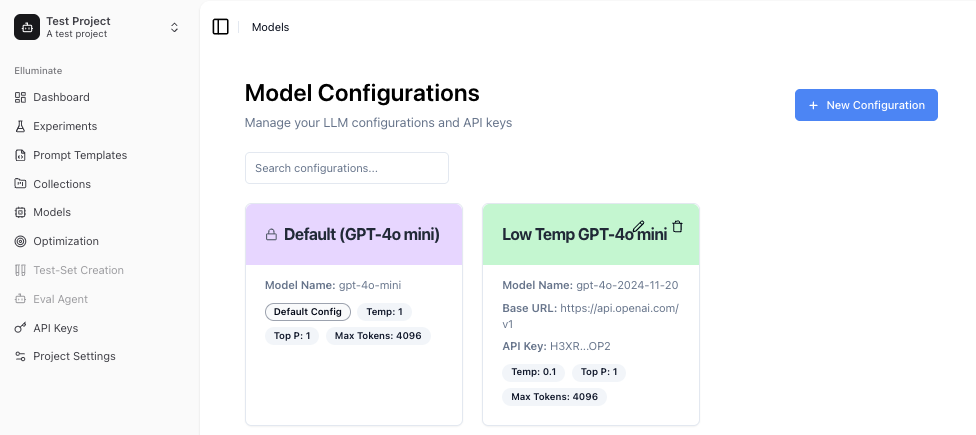
Creating a Configuration
To create a new LLM configuration, navigate to the Models page in your project and click Create.
Basic Settings
Enter a name and optional description, then select your provider (OpenAI, BCVP API, or Custom API). Depending on the provider, fill in the model name, Base URL, and API Key.
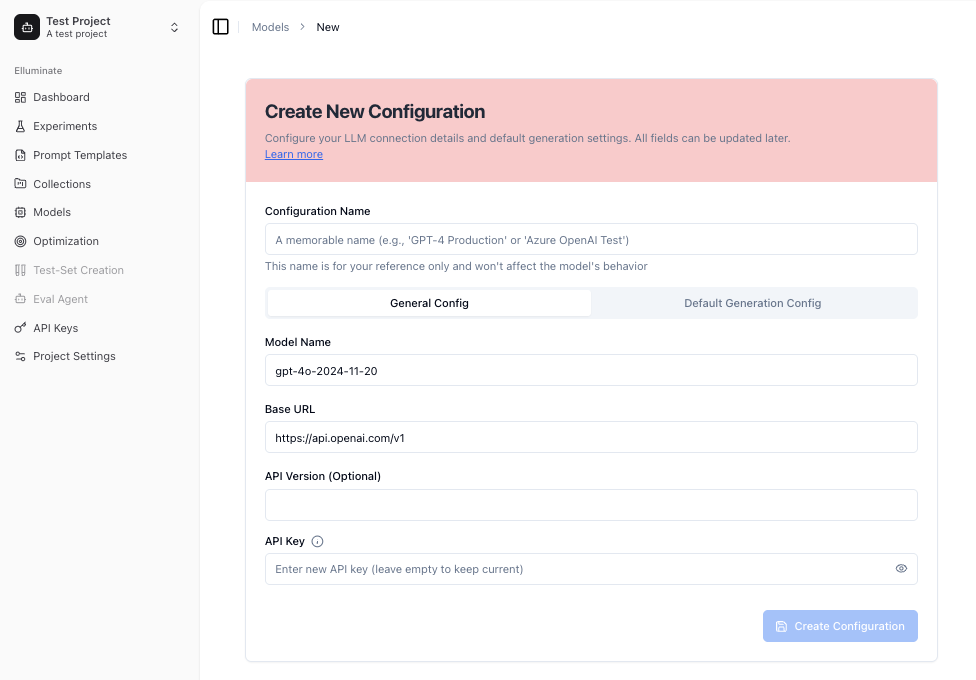
Using a different Base URL and API Key lets you route your connection through a custom gateway or proxy.

Generation Parameters
Under Advanced Settings, you can fine-tune how the model generates responses:
- Temperature (0–2): Controls randomness. Lower values produce more deterministic output.
- Top P (0–1): Nucleus sampling threshold. Lower values restrict the token pool.
- Max Tokens: Maximum response length.
- Max Connections: Number of parallel requests elluminate can make to this model.
- Reasoning Effort: For newer reasoning models (o-series), controls the depth of chain-of-thought reasoning.
For standard configurations, you can use the provider's default values by clicking the checkbox.
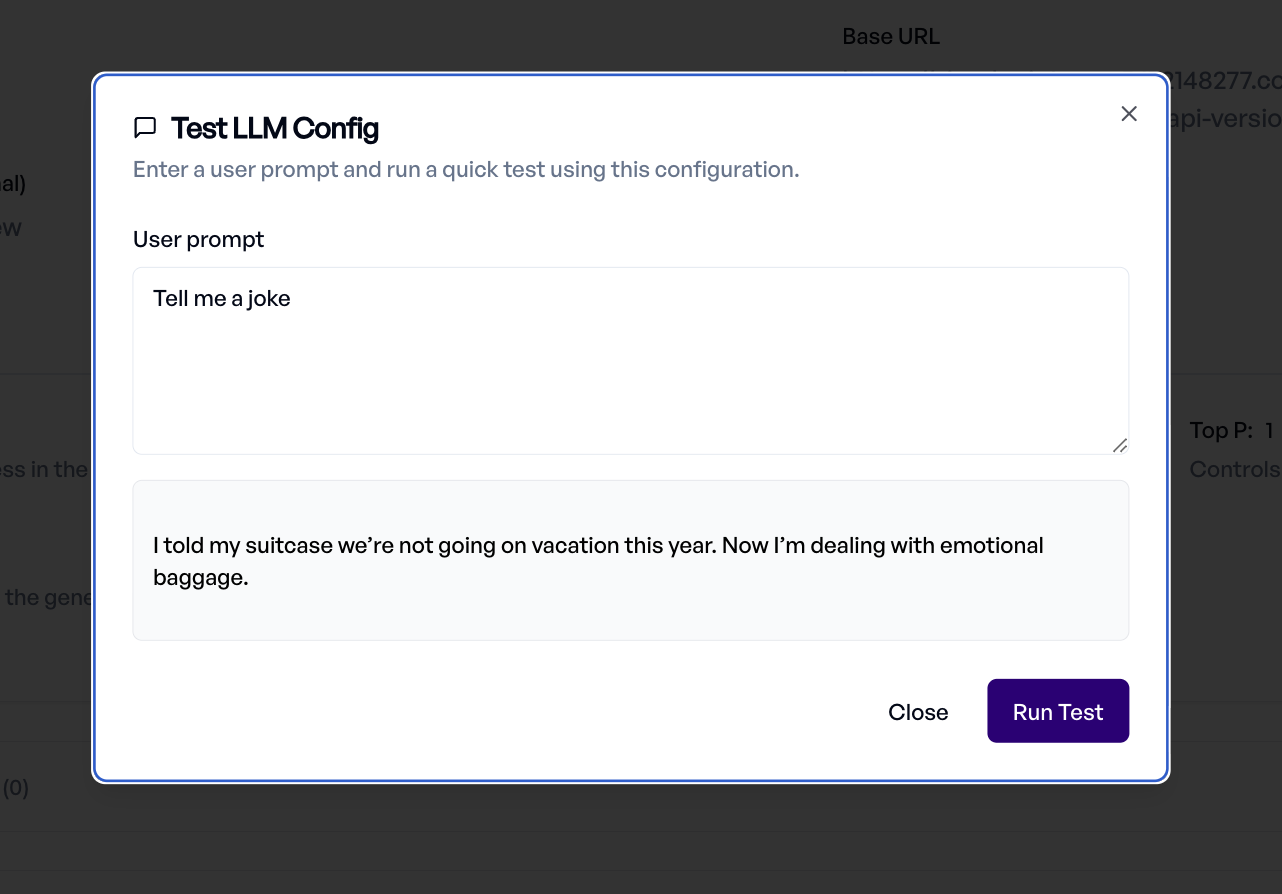
Testing Your Configuration
Once configured, click Test Configuration to verify the connection works. Enter a test prompt and review the response directly in the dialog.
Custom API Endpoints
Custom API Endpoints let you connect any HTTP-based AI application to elluminate — whether it's your own model server, a fine-tuned deployment, a RAG pipeline, an agentic system, or any service that accepts prompts and returns text. Once configured, your custom endpoint can be used in any experiment, just like a built-in provider.
Setting Up a Custom Endpoint
Select Custom API as the inference type, then fill in the Base URL and API Key for your endpoint. The Base URL must include the full path to your endpoint (e.g., https://your-api.example.com/v1/chat) — elluminate sends requests directly to this URL without appending any path. The main configuration happens in the API Configuration Template — a JSON editor where you define how elluminate communicates with your API.
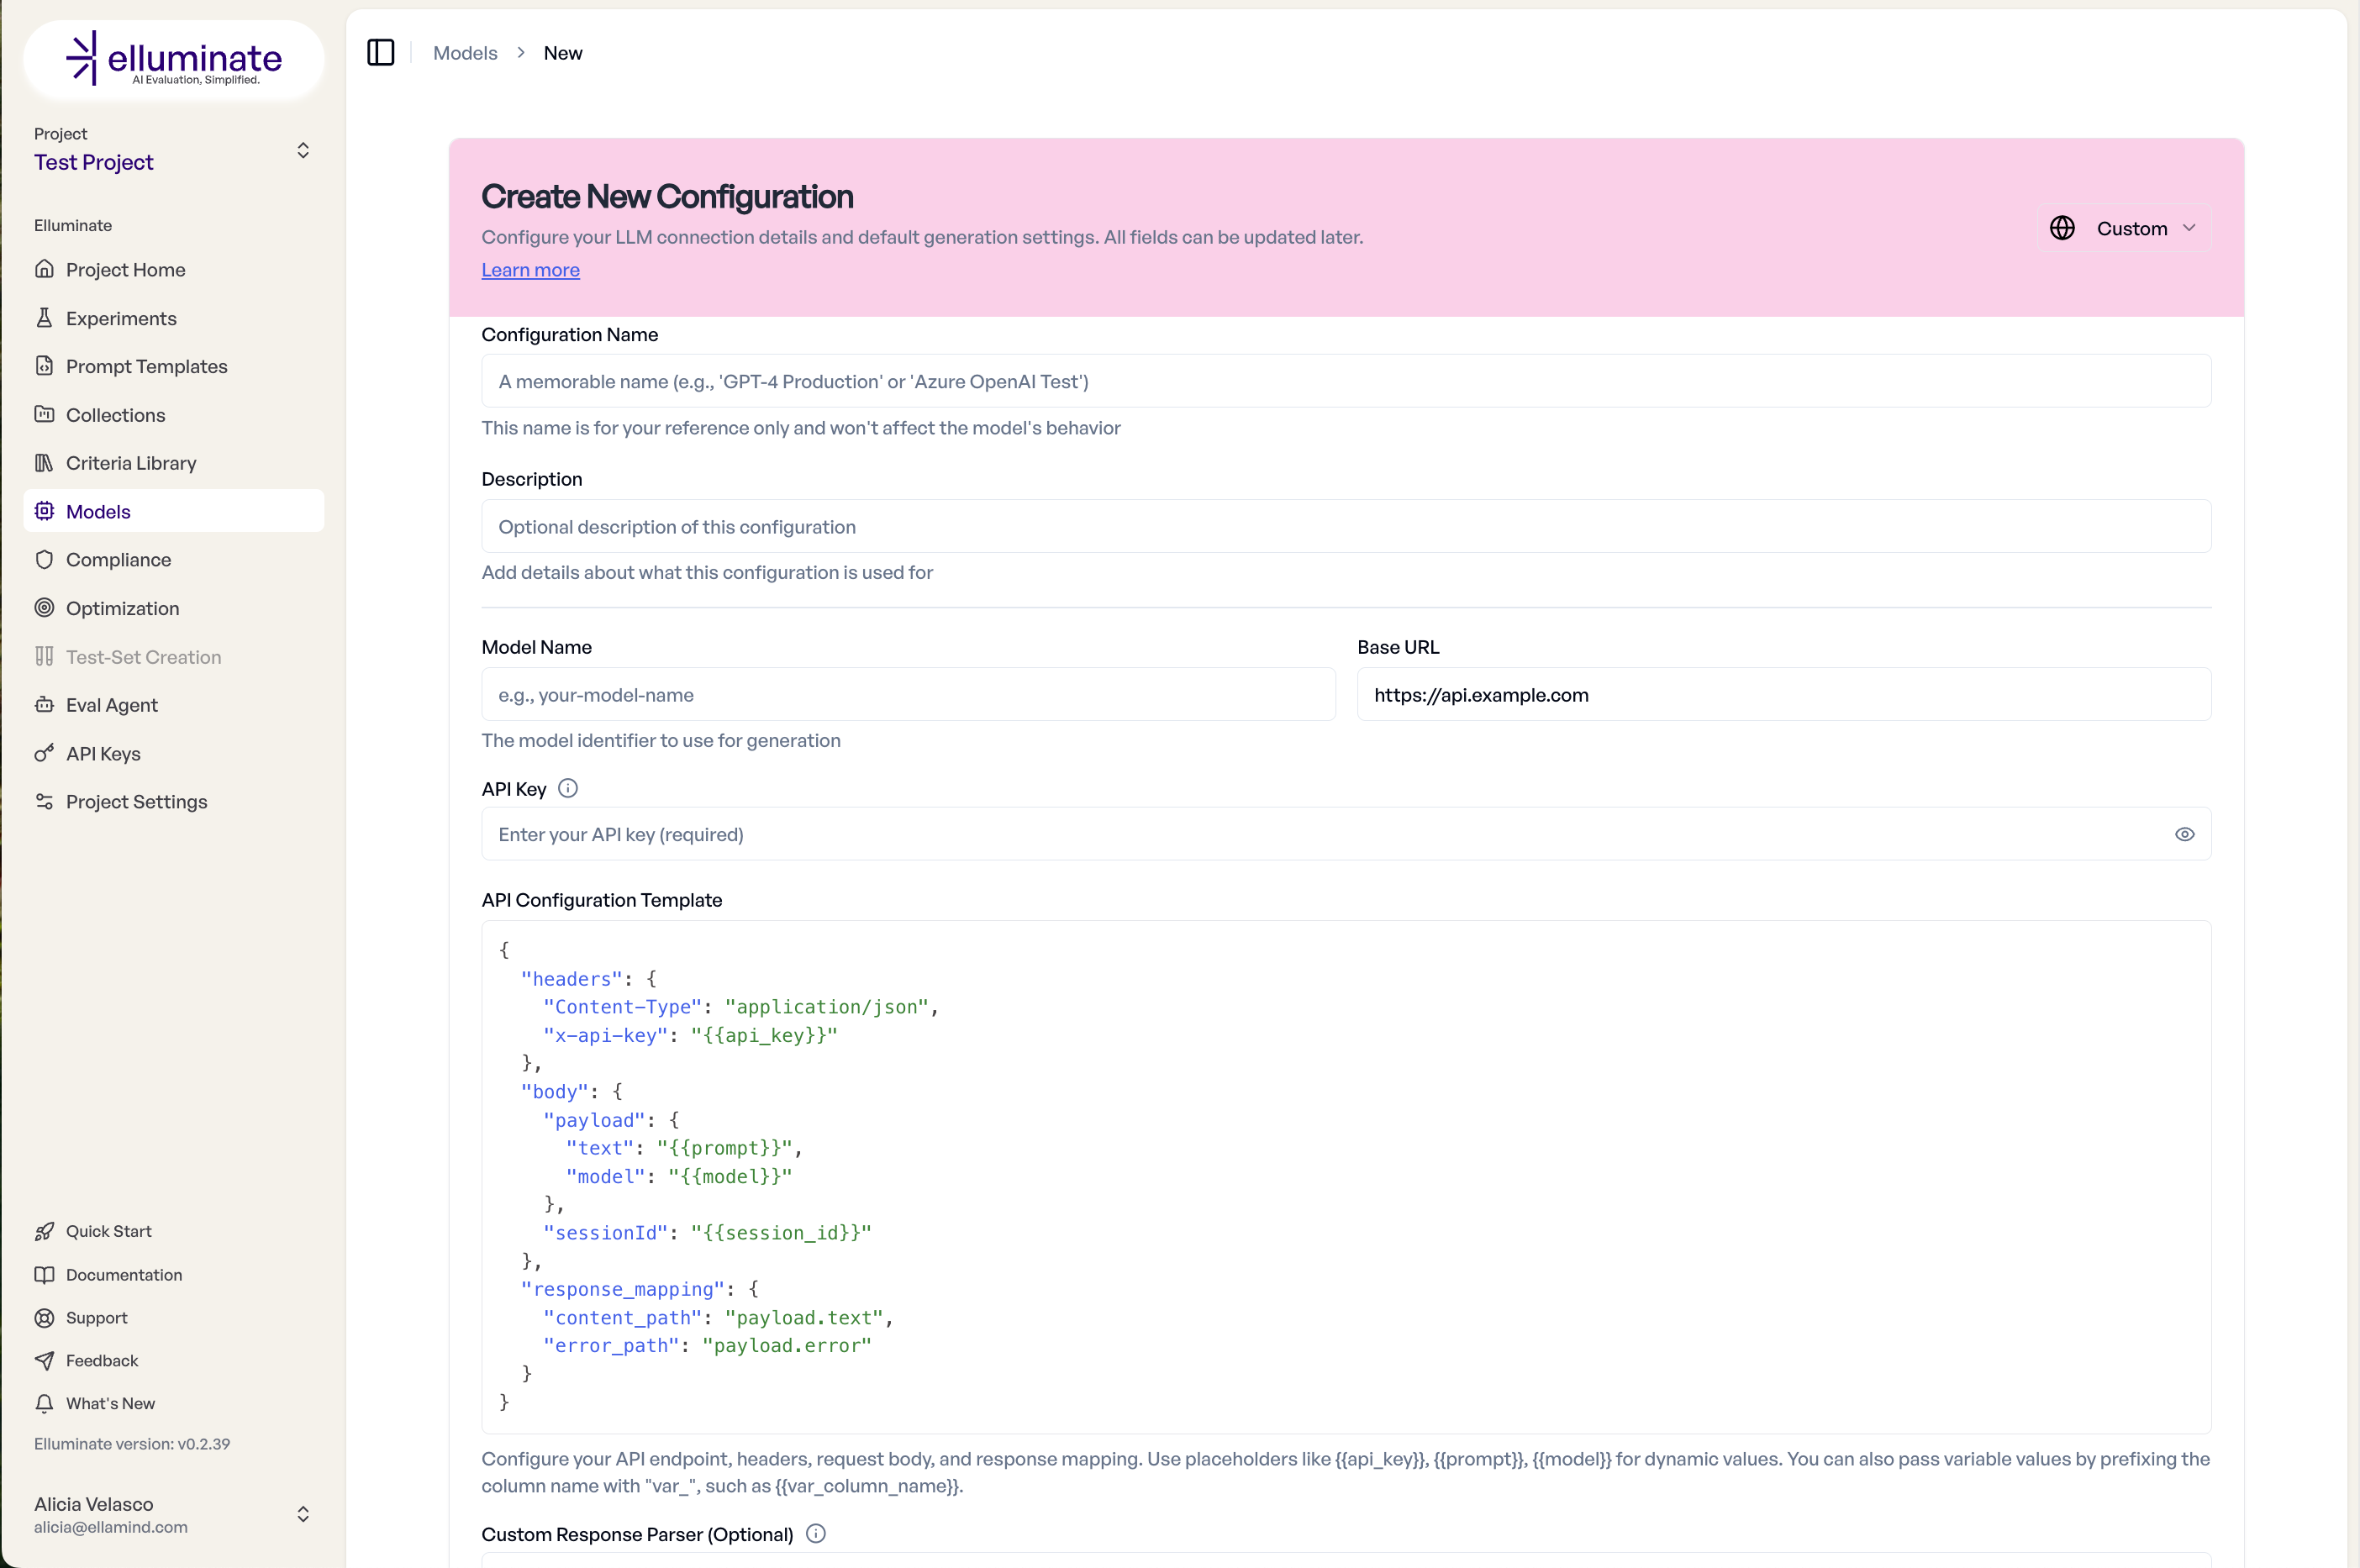
The template has three required sections:
Headers
HTTP headers sent with every request. Use placeholders for dynamic values:
Body
The JSON request body. Supports placeholders and nested structures. Use {{prompt}} for single-turn or {{messages}} for multi-turn conversations:
Response Mapping
Tells elluminate where to find the content in your API's JSON response:
| Key | Required | Description |
|---|---|---|
content_path |
Yes | Dot-notation path to the response content. Supports list indices (e.g., data.response, choices.0.message.content). |
error_path |
No | Dot-notation path to error messages (e.g., error.message) |
Available Placeholders
Use {{placeholder_name}} syntax in headers and body. These are replaced with actual values before each request:
| Placeholder | Description |
|---|---|
{{api_key}} |
The API key configured for this LLM config |
{{prompt}} |
The first user message content (for single-turn use cases) |
{{messages}} |
Full conversation message array including system, user, and assistant messages (for multi-turn) |
{{model}} |
The model name from the configuration |
{{base_url}} |
The configured base URL |
{{timestamp}} |
Current Unix timestamp |
{{uuid}} |
A unique request identifier (UUID v4) |
{{session_id}} |
A session identifier in the format elluminate-<uuid> |
{{var_<name>}} |
Template variable values from your collection, prefixed with var_ (e.g., {{var_user_id}} for a variable named user_id) |
Type preservation
When a placeholder is the entire value of a field (e.g., "{{messages}}"), the original type is preserved — lists stay lists, dicts stay dicts. When embedded in a string (e.g., "Bearer {{api_key}}"), standard string interpolation is used.
Multi-Turn Conversations
For APIs that support multi-turn conversations, use {{messages}} to pass the full conversation array:
{
    "headers": {
        "X-API-Key": "{{api_key}}",
        "Content-Type": "application/json"
    },
    "body": {
        "conversation": "{{messages}}",
        "model": "{{model}}"
    },
    "response_mapping": {
        "content_path": "response.text"
    }
}
The {{messages}} array contains messages in OpenAI format with role and content fields.
Custom Response Parser
For APIs with non-standard response formats, you can add a Custom Response Parser — a Python code snippet that transforms the raw API response into the format elluminate expects.

The content_path extraction always yields a string (non-string values are JSON-serialized). To get list-of-messages behavior (see Response Handling steps 5–6), your parser must return a list.
The parser receives raw_response (a string) and has access to json and re (pre-imported). Your code must set parsed_response with the final result (string or list). The parser is limited to 5,000 characters and a 2-second execution timeout.
Example: Connecting an Agentic System
Suppose you have a RAG agent and want to evaluate not just the final answer, but the full execution trace — tool calls, retrieval steps, reasoning. Here's how to set it up:
API Configuration Template:
{
    "headers": {
        "Authorization": "Bearer {{api_key}}",
        "Content-Type": "application/json"
    },
    "body": {
        "messages": "{{messages}}",
        "config": {
            "temperature": 0.2,
            "return_trace": true,
            "reasoning_effort": "high"
        }
    },
    "response_mapping": {
        "content_path": "trace"
    }
}
Custom Response Parser:
How this works:
body.messagespasses the full conversation to the agent via{{messages}}.body.configsends additional options your endpoint needs.response_mapping.content_pathpoints to the trace object in the response JSON.- Custom Response Parser extracts the message sequence from the serialized trace so elluminate displays it as a conversation.
Response Handling
elluminate processes custom API responses as follows:
- The API response is parsed as JSON. If parsing fails, the raw text is wrapped as
{"text": "<raw response>"}. - The
content_pathextracts the response content from the JSON. - If a
custom_response_parseris configured, it is applied to the extracted content. - If the
error_pathis configured and contains a value, it is logged as a warning. - If the final content is a list, it is treated as a list of message objects (each with
roleandcontentfields). - If the final content is a string, it is wrapped as an assistant message.
Limitations
- Only
POSTrequests are supported — the endpoint must return a 2xx status code - Streaming is not supported
- Token usage metrics (input/output tokens) are not available for custom endpoints
- Structured outputs and tool calling are not supported
- The connect and read timeout defaults to 60 seconds (configurable via the
timeoutfield on the LLM config)
Monitoring and Analytics
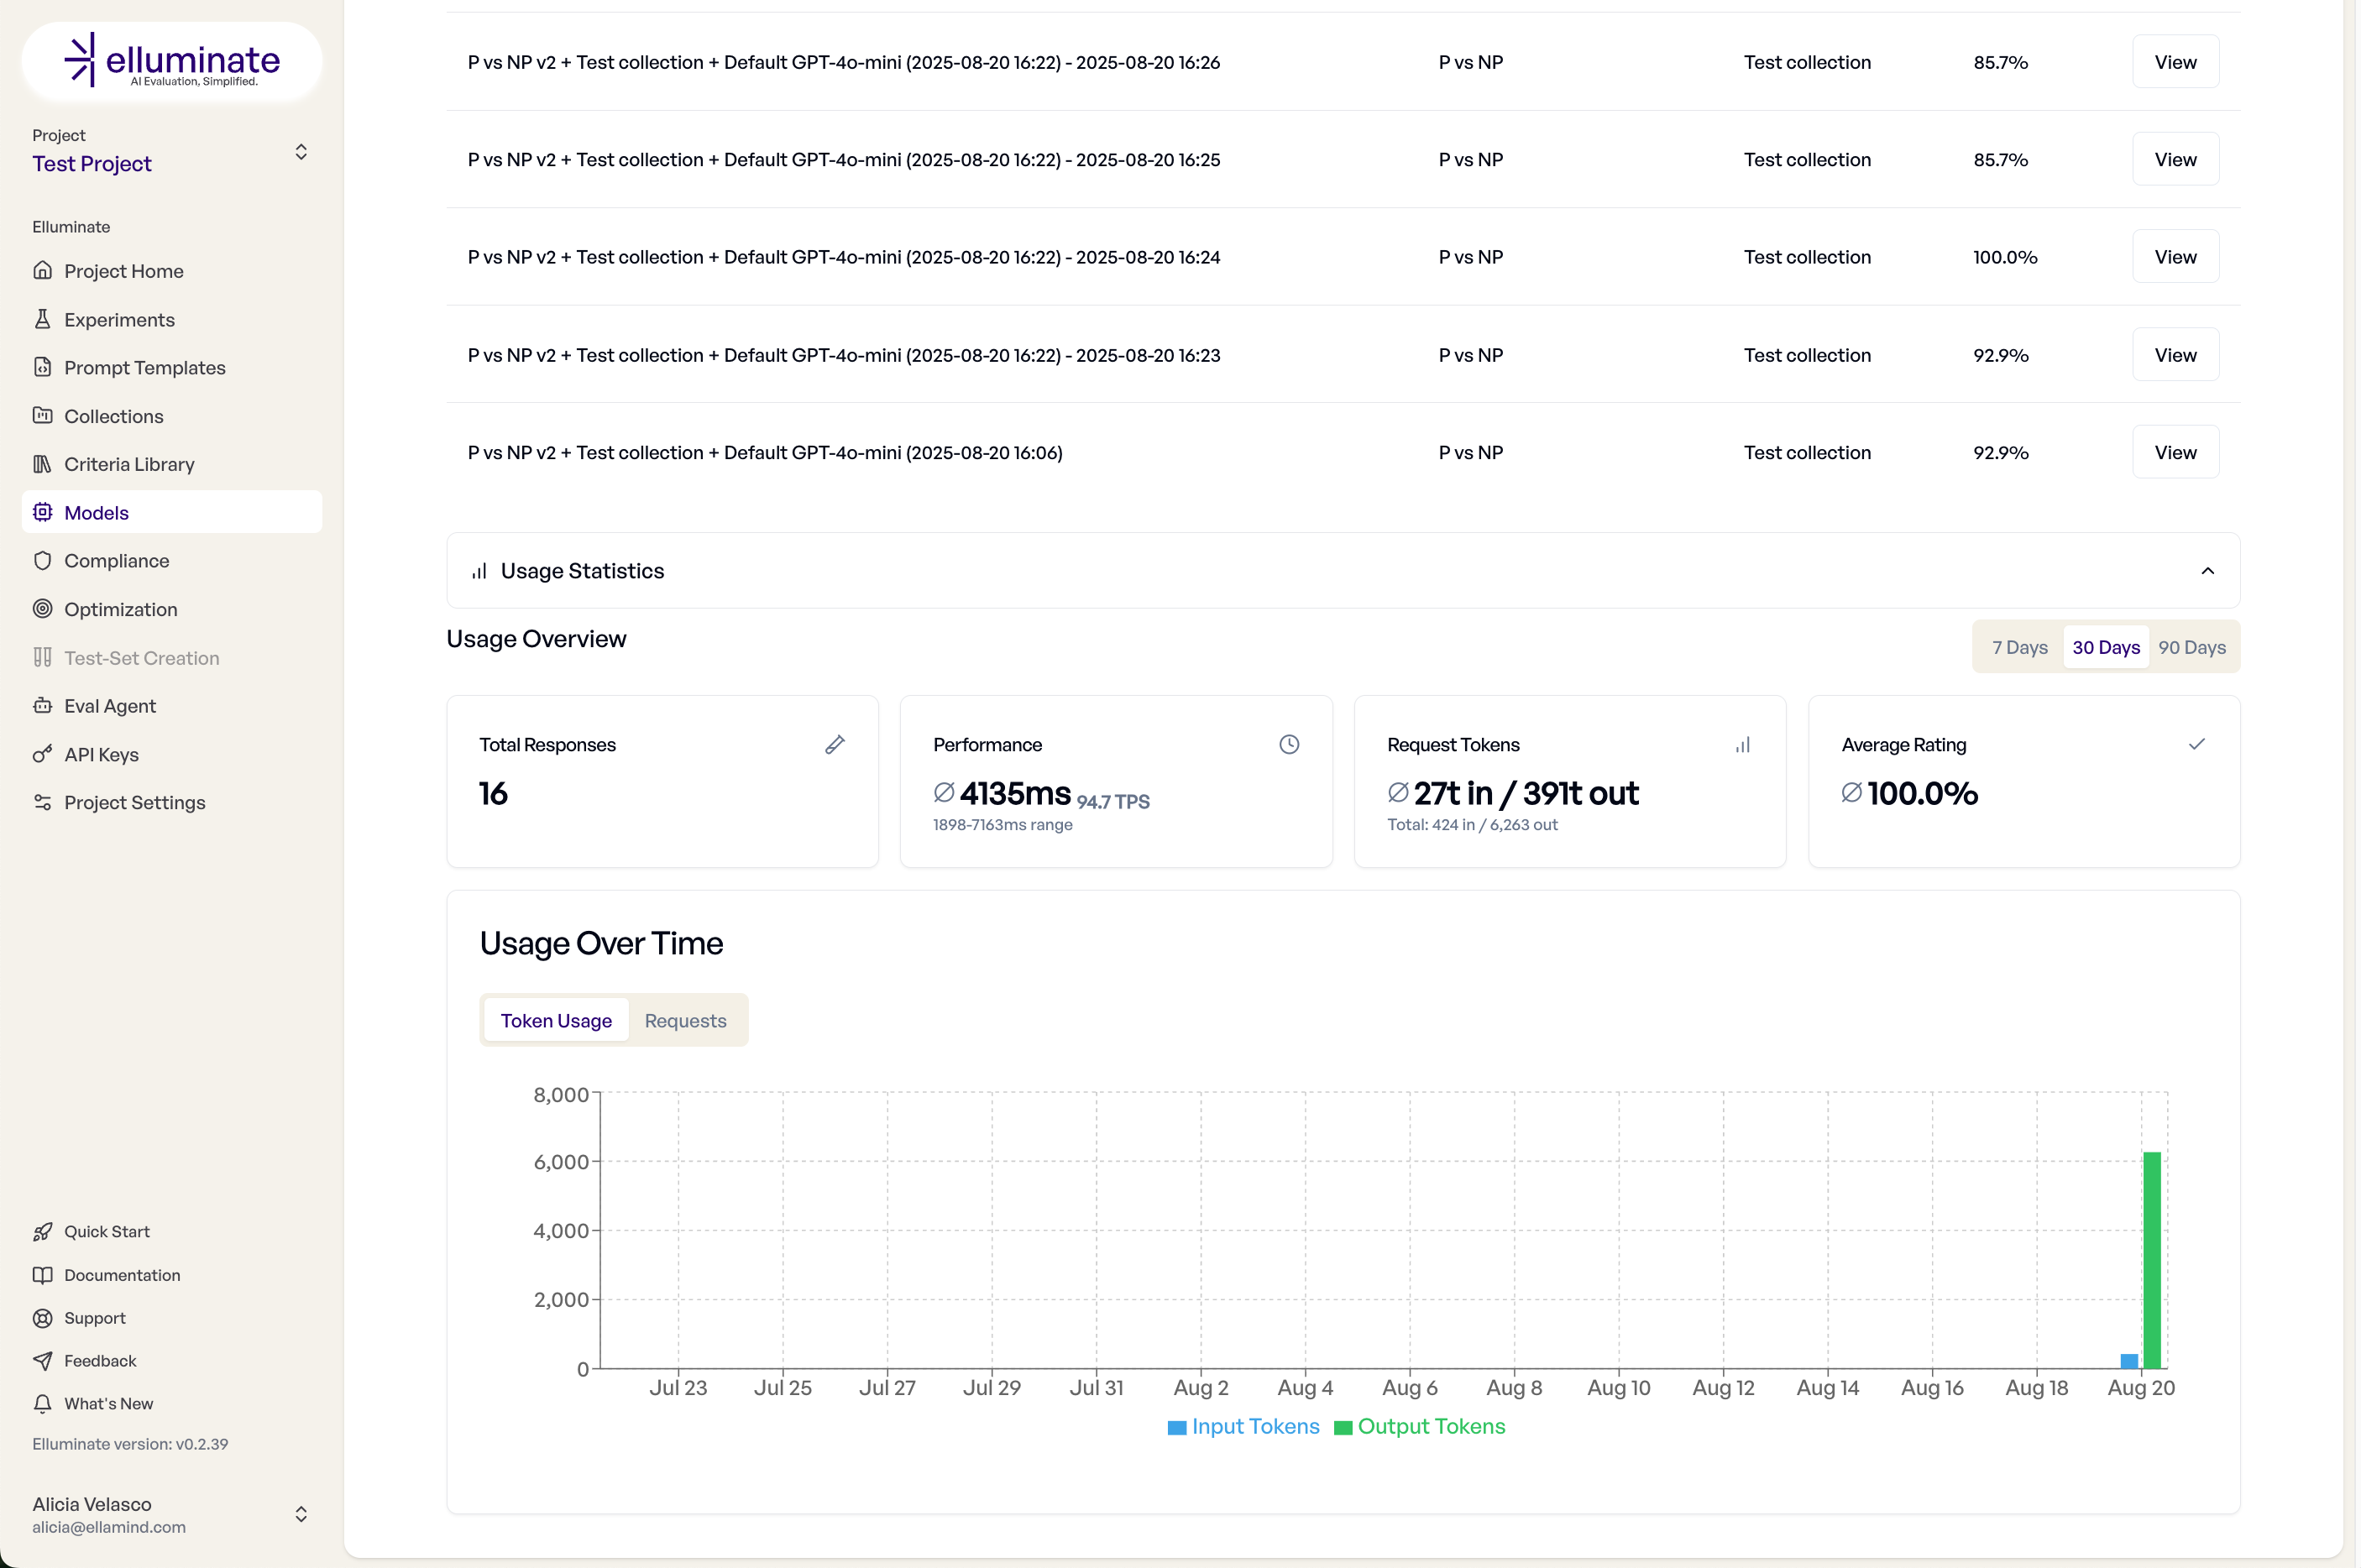
Track the usage of a model configuration — experiments run and performance metrics — in the configuration details view.
SDK Integration
All configurations created in the UI can also be managed via the SDK. Use get_or_create_llm_config for idempotent setup:
performance_config, created = client.get_or_create_llm_config(
    name="Fast Response Model",
    defaults={
        "llm_model_name": "gpt-4o-mini",
        "api_key": "key",
        "inference_type": InferenceType.OPENAI,
        # Performance settings
        "max_tokens": 500,  # Limit response length
        "temperature": 0.3,  # More deterministic
        "top_p": 0.9,  # Nucleus sampling
        "max_connections": 20,  # Parallel requests
        "timeout": 10,  # Fast timeout in seconds
        "max_retries": 2,  # Limited retries
        "description": "Optimized for quick responses",
    },
)
Custom API endpoints follow the same structure — pass custom_api_config and optionally custom_response_parser:
custom_config, created = client.get_or_create_llm_config(
    name="My Custom Model v2",
    defaults={
        "llm_model_name": "custom-model-v2",
        "api_key": "your-api-key",
        "llm_base_url": "https://api.mycompany.com/v1",
        "inference_type": InferenceType.CUSTOM_API,
        "custom_api_config": {
            "headers": {
                "Authorization": "Bearer {{api_key}}",
                "Content-Type": "application/json",
                "X-Model-Version": "{{model}}",
            },
            "body": {"prompt": "{{prompt}}", "max_tokens": 1000, "temperature": 0.7, "stream": False},
            "response_mapping": {"content_path": "data.response", "error_path": "error.message"},
        },
        "description": "Our production recommendation model",
    },
)
Best Practices
Configuration Strategy
- Development: Use cheaper, faster models
- Staging: Test with production models
- Production: Optimize parameters for your use case
- Monitoring: Set up your own endpoints for visibility
Custom API Best Practices
- Standardize Response Format: Use consistent JSON structure across endpoints
- Include Metadata: Return model version, latency and confidence
- Error Handling: Provide clear error messages via the
error_path - Rate Limiting: Implement appropriate throttling on your endpoint
- Monitoring: Log all requests for analysis
Troubleshooting
Common Issues
Connection Failed
- Verify API key is valid
- Check base URL format (must start with
http://orhttps://) - Ensure network connectivity
- Confirm firewall rules
Slow Responses
- Reduce max_tokens
- Lower temperature
- Check API rate limits
- Consider model size
Inconsistent Results
- Lower temperature for determinism
- Set seed parameter if available
- Use consistent system prompts
- Verify model version